His own photographs, including the unflattering ones.
Half of these are taken mid-job, with the floor open and nothing to look at yet. They are here on purpose: a finished room proves taste, and every quote you take will show you one. What is underneath is what you are actually paying for, and it is the only part you cannot inspect once the tile is down.
-
One shower, start to finish Step 1 of 8
Shower
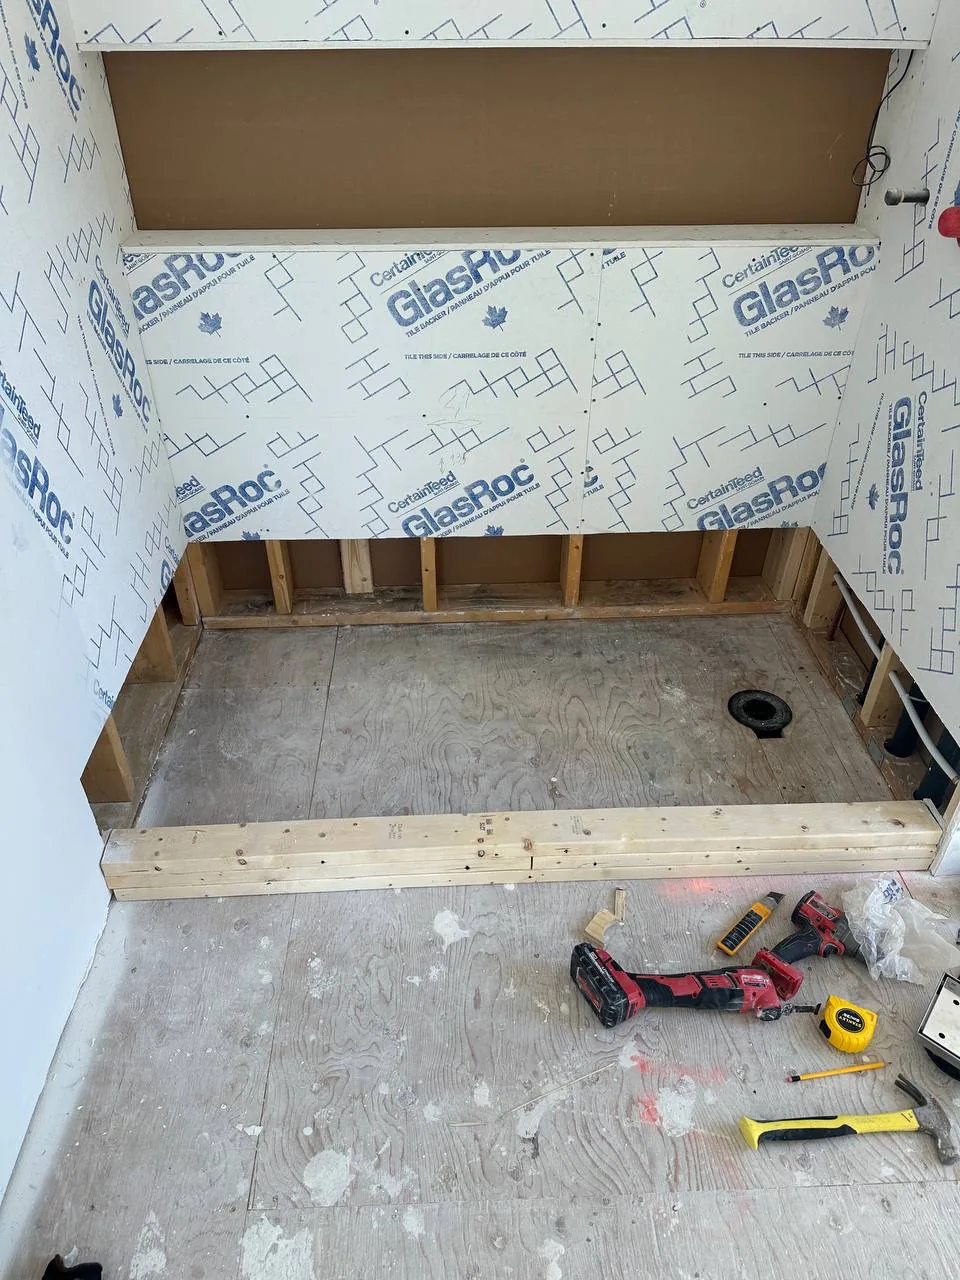
The curb, built before anything is waterproofed
A shower curb that flexes will crack the tile on top of it later, whatever is bedded underneath. It gets built solid and blocked out first, while it is still easy to do.
-
One shower, start to finish Step 2 of 8
Shower
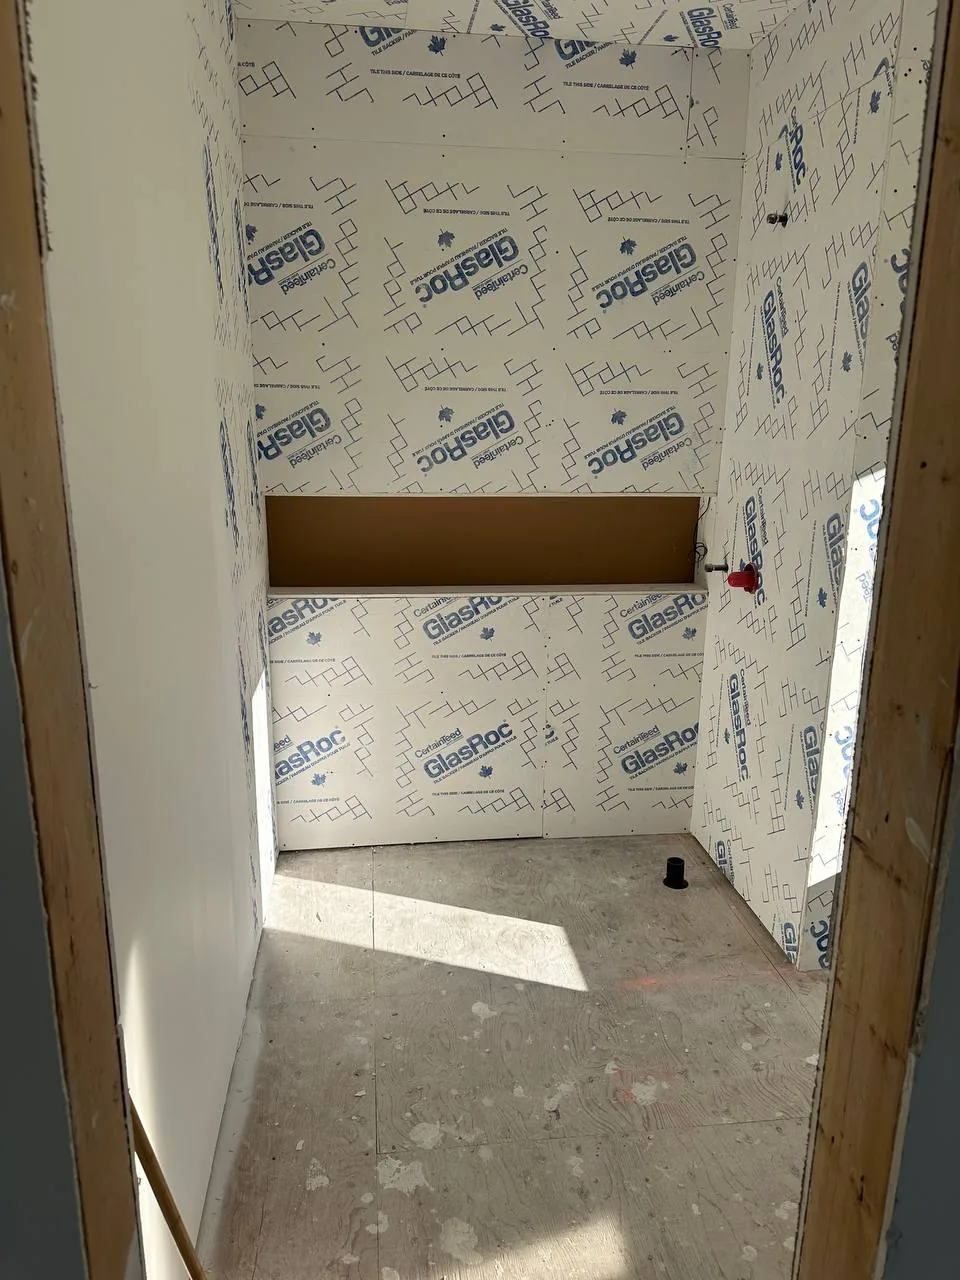
Glass-mat board on the walls, niche framed into the opening
Ordinary drywall in a shower turns to porridge the first time water finds it. This is glass-mat board, and the niche is framed into the wall rather than hung on it.
-
One shower, start to finish Step 3 of 8
Waterproofing
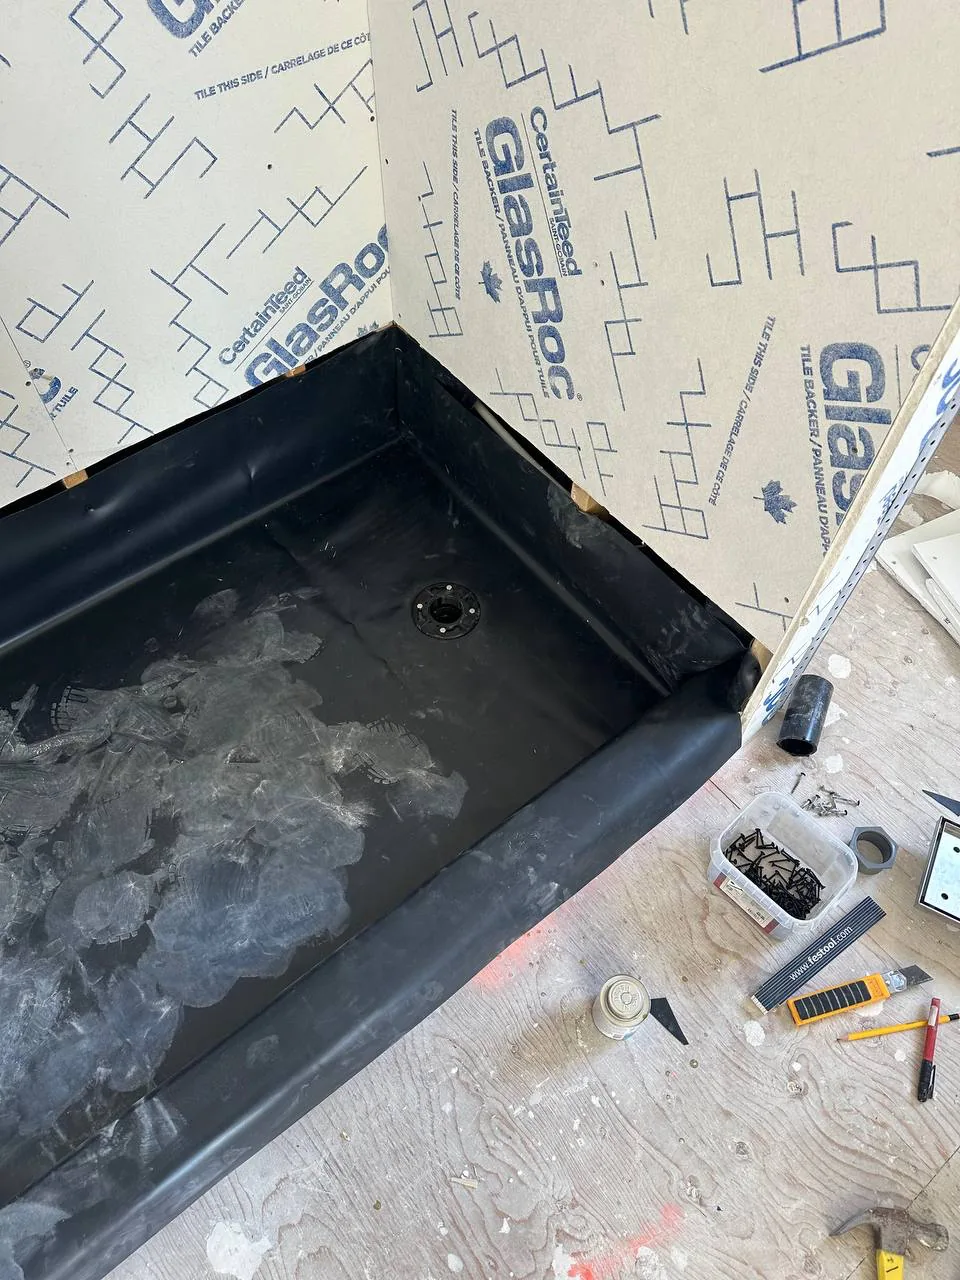
Pan liner corners folded, never cut
This is the photograph worth studying. The corner is folded like paper and taken up the wall in one piece. A cut corner is a seam, and a seam in the lowest corner of a shower is where a leak starts.
-
One shower, start to finish Step 4 of 8
Waterproofing
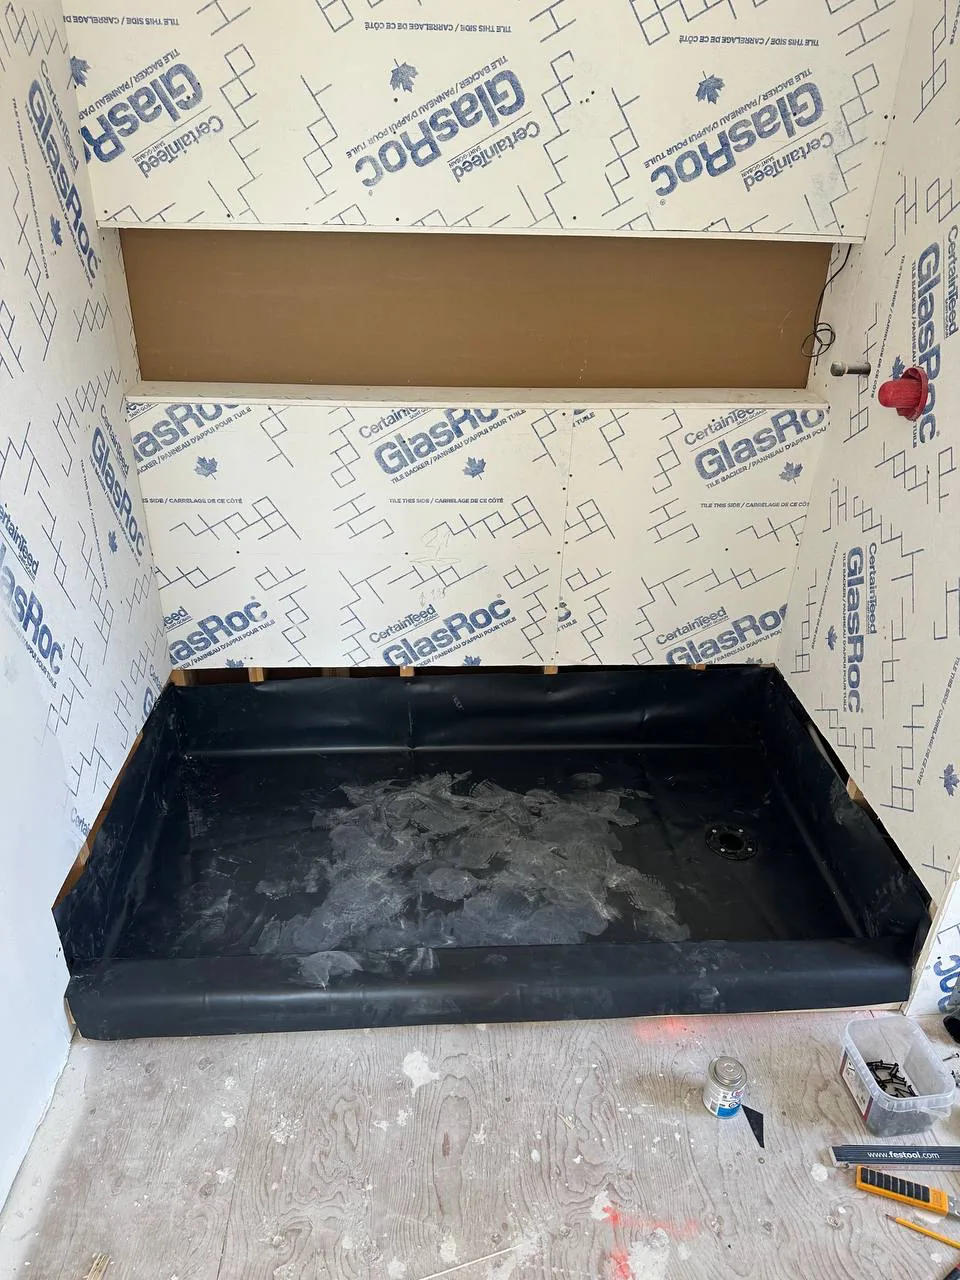
Liner turned up above the curb line, all four sides
The liner goes higher than the water can ever stand. Everything above this line is finish; everything below it is the part that has to hold, and nobody will ever see it again.
-
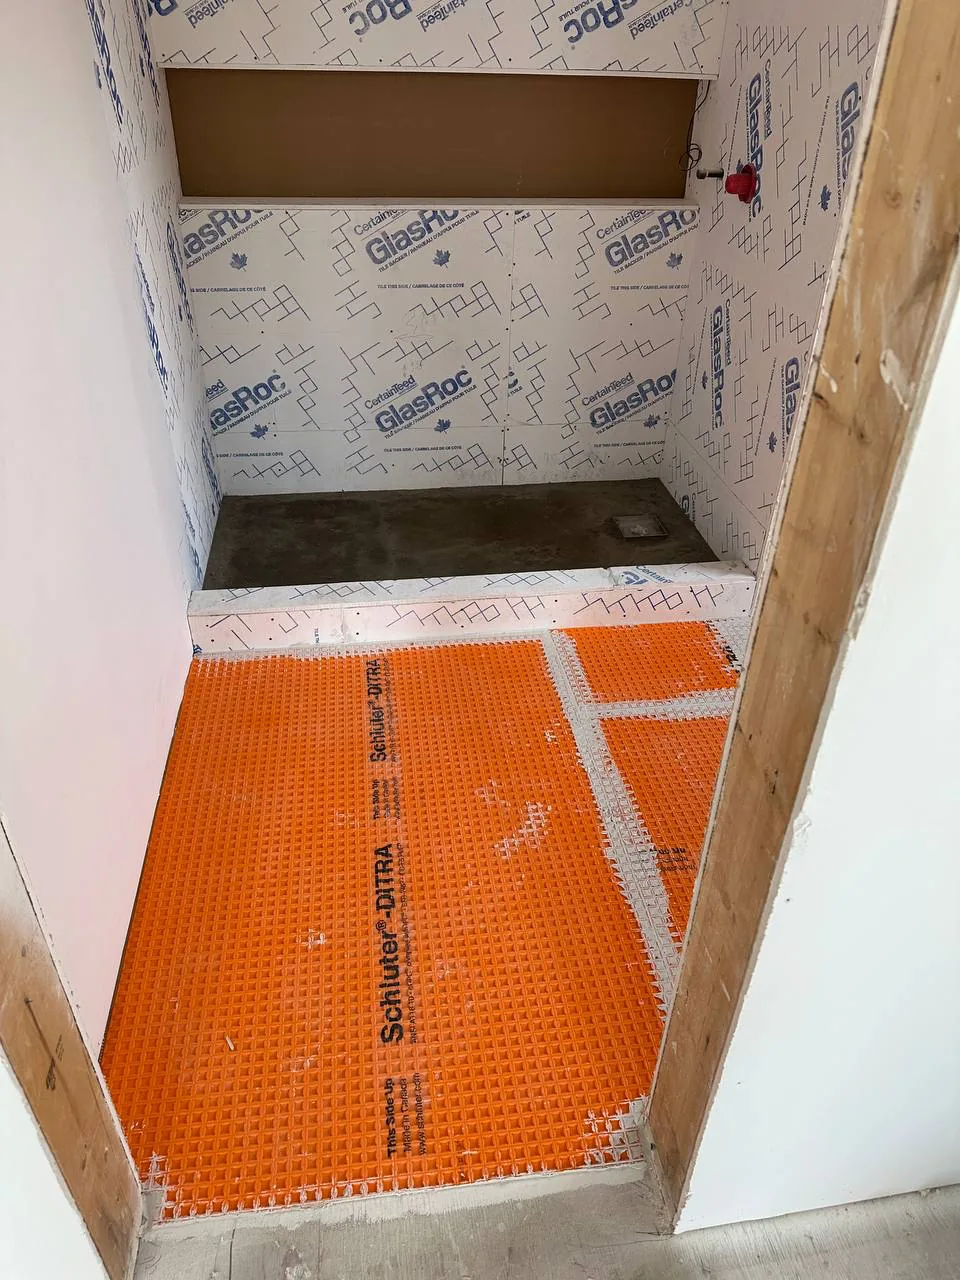
One shower, start to finish Step 5 of 8
Waterproofing
Uncoupling membrane over the whole floor
The membrane lets the floor below move without dragging the tile with it. Wood subfloors move with the seasons; this is what stops that showing up as a cracked grout line in March.
-
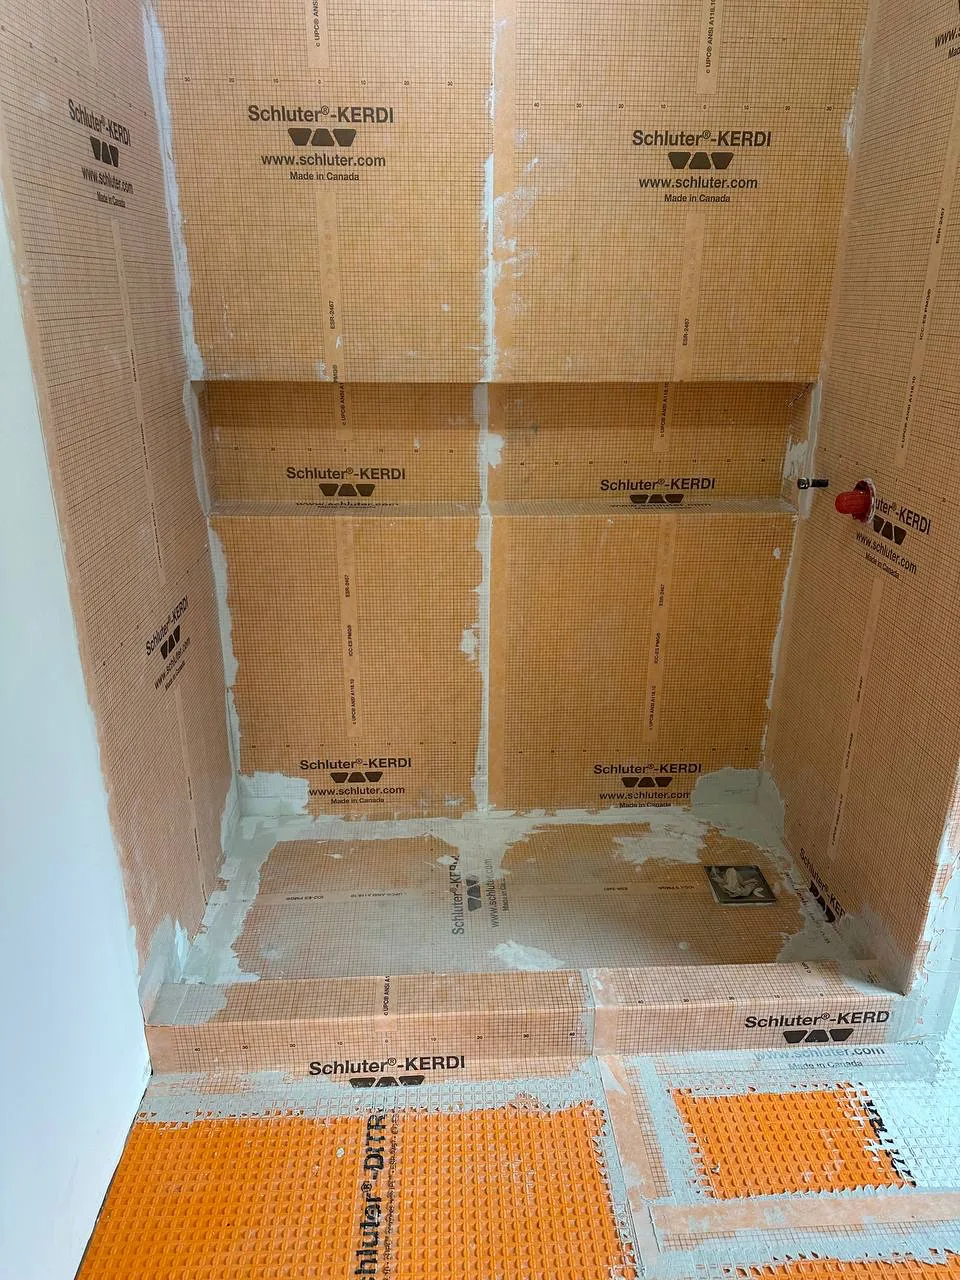
One shower, start to finish Step 6 of 8
Waterproofing
Walls and niche sealed as one surface
Bonded sheet membrane over every wall, with the seams banded and the niche taken in as part of the same skin. A niche waterproofed separately from the wall around it is a box with a joint at the bottom of it.
-
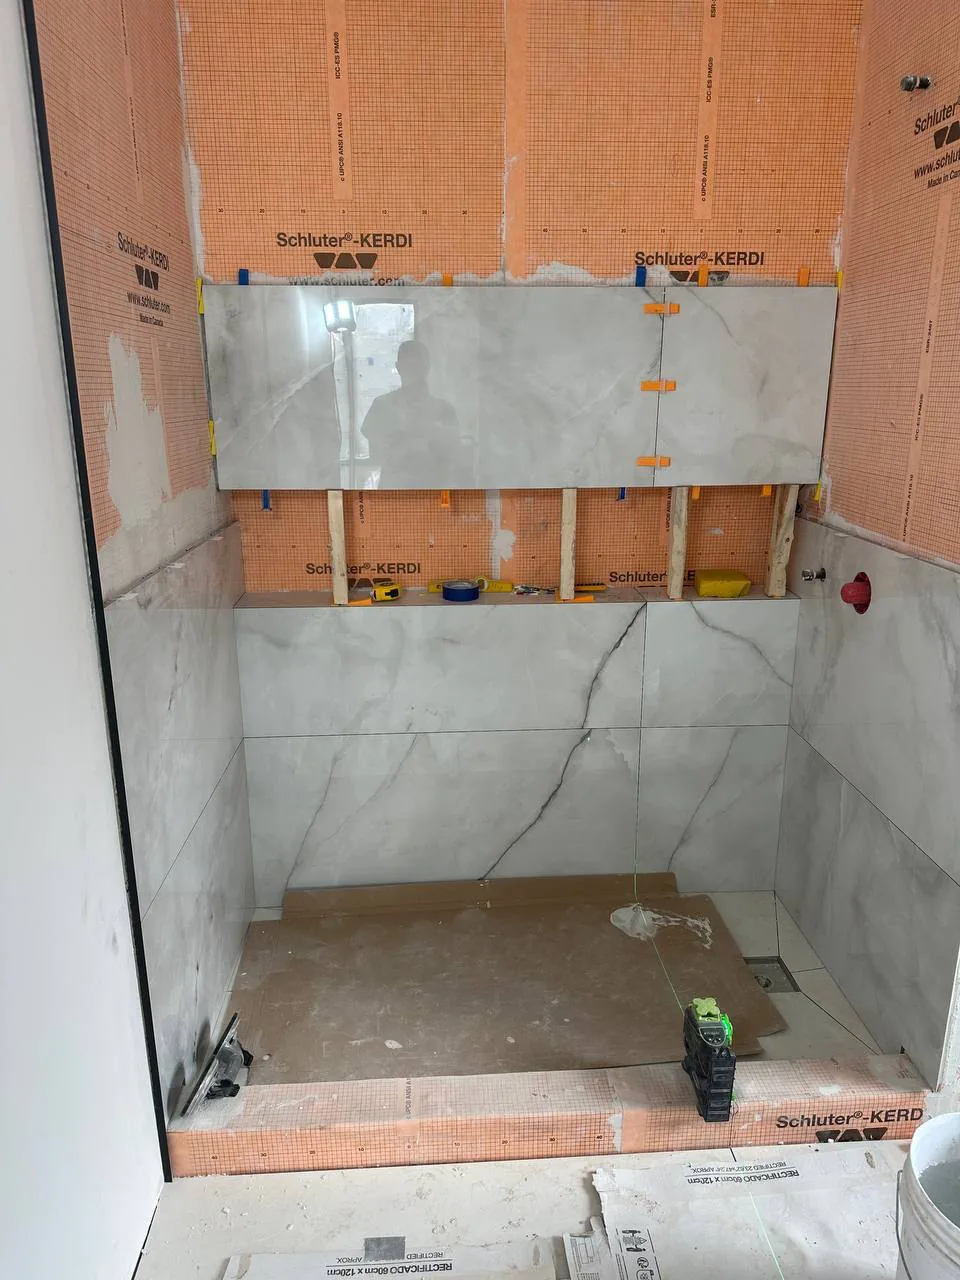
One shower, start to finish Step 7 of 8
Large format
Large-format walls going up over the sealed shell
Only now does anything visible happen. Every decision that keeps this shower dry was made before the first tile was lifted.
-
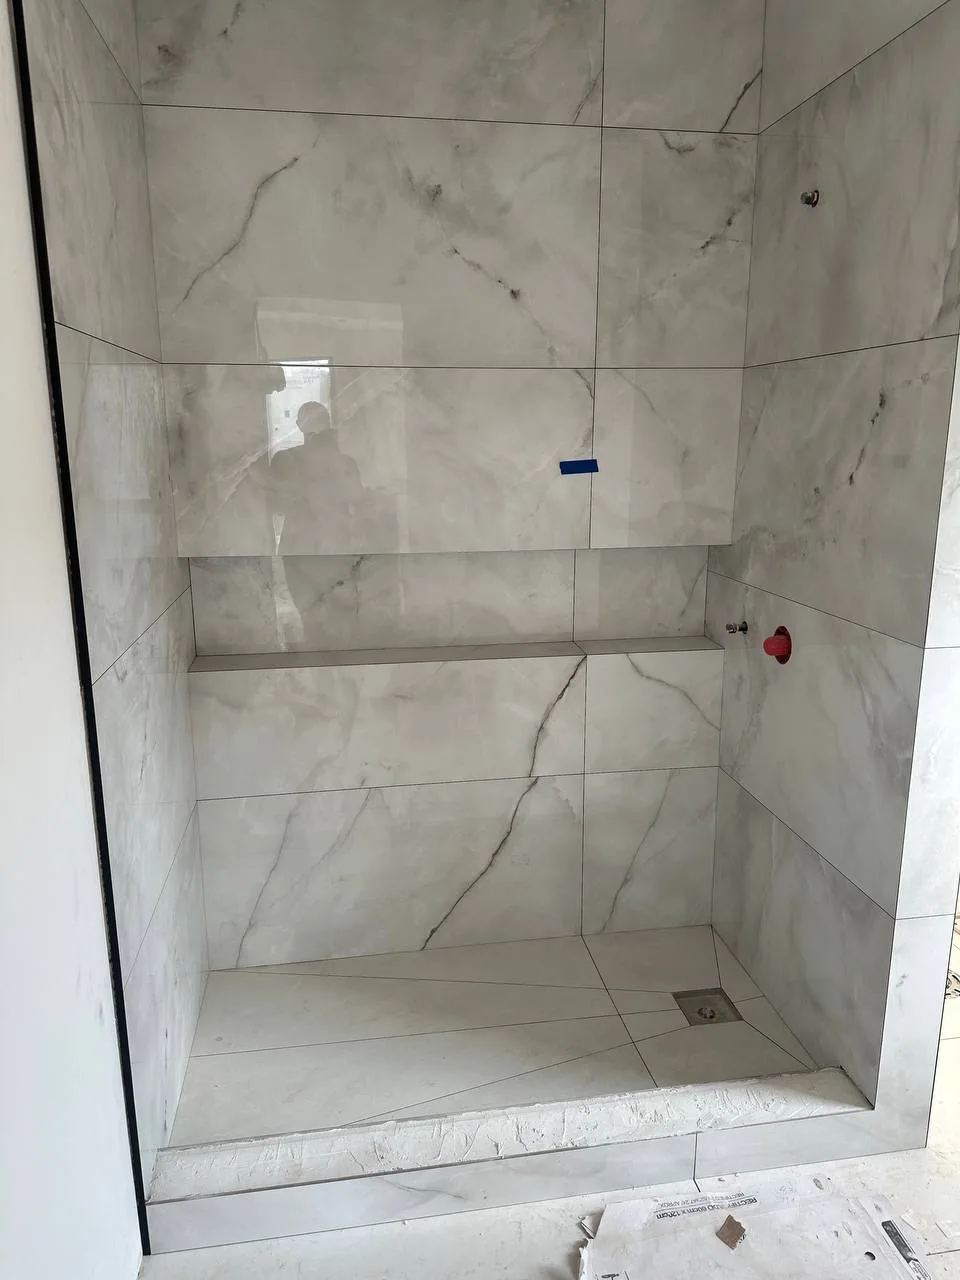
One shower, start to finish Step 8 of 8
Shower
The same shower, finished
Same room as the black liner five photographs back. This is what the quote buys, and the liner is why it will still look like this in ten years.
-
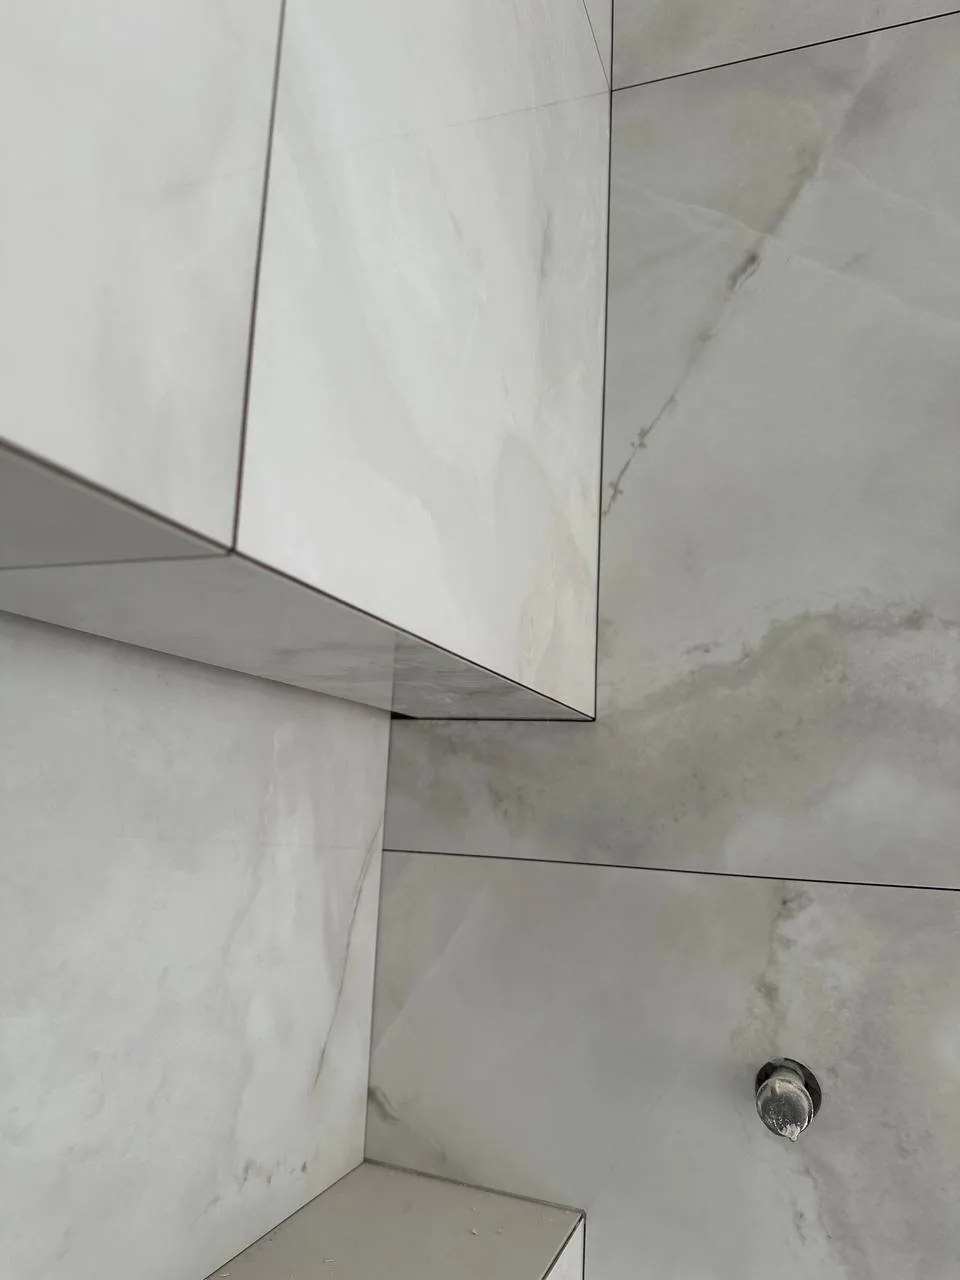
Detail
Bench edge mitred at 45°
Two slabs cut back to 45° and closed on each other, so the edge is stone all the way round. The alternative is a plastic trim strip, which is the detail that dates a bathroom.
-
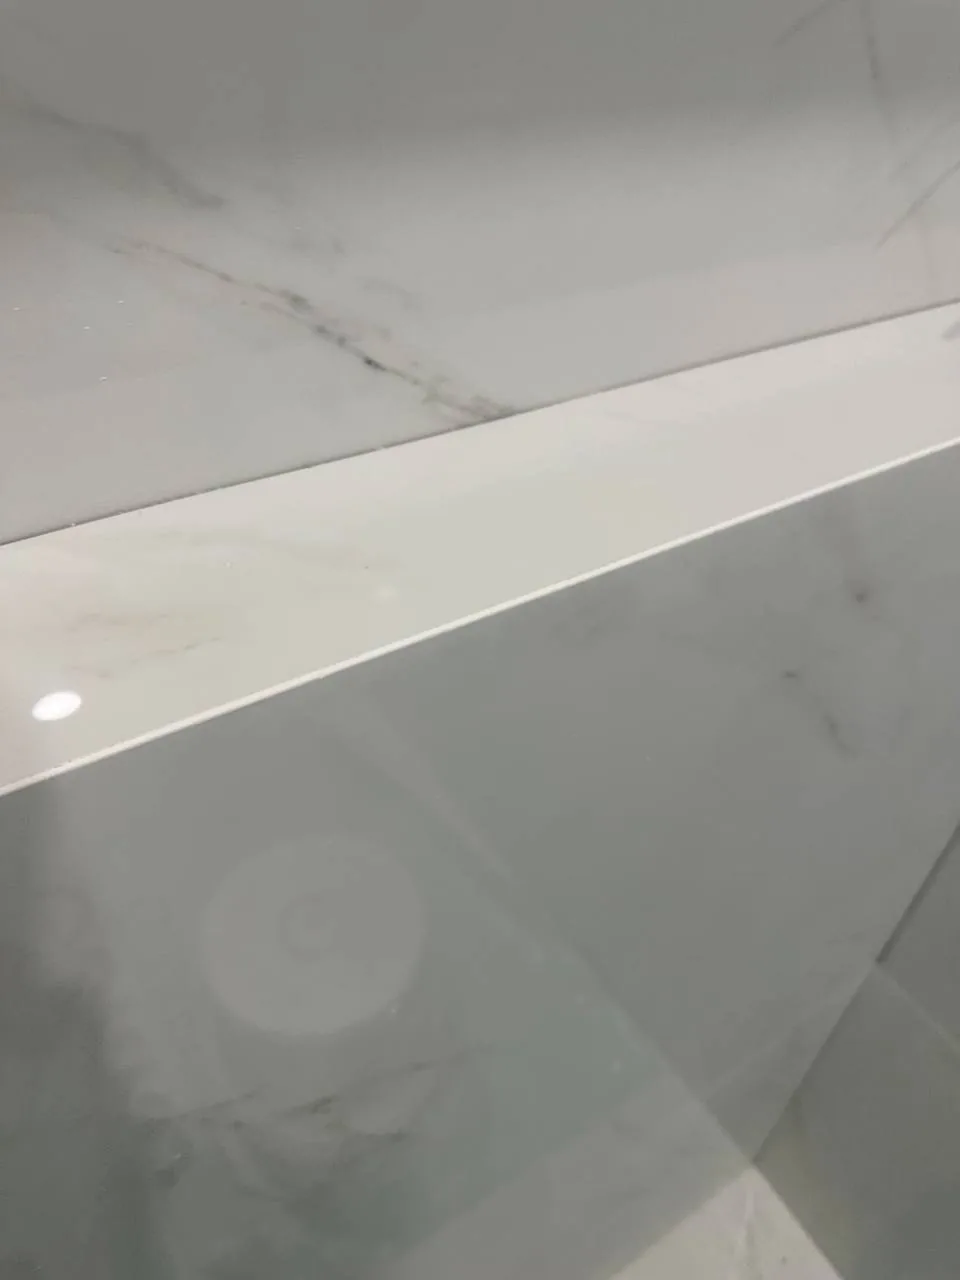
Detail
The same joint, closed to a hairline
A mitre only works if both cuts are true along the whole length. There is nowhere to hide on an edge like this and no trim that can be added afterwards.
-
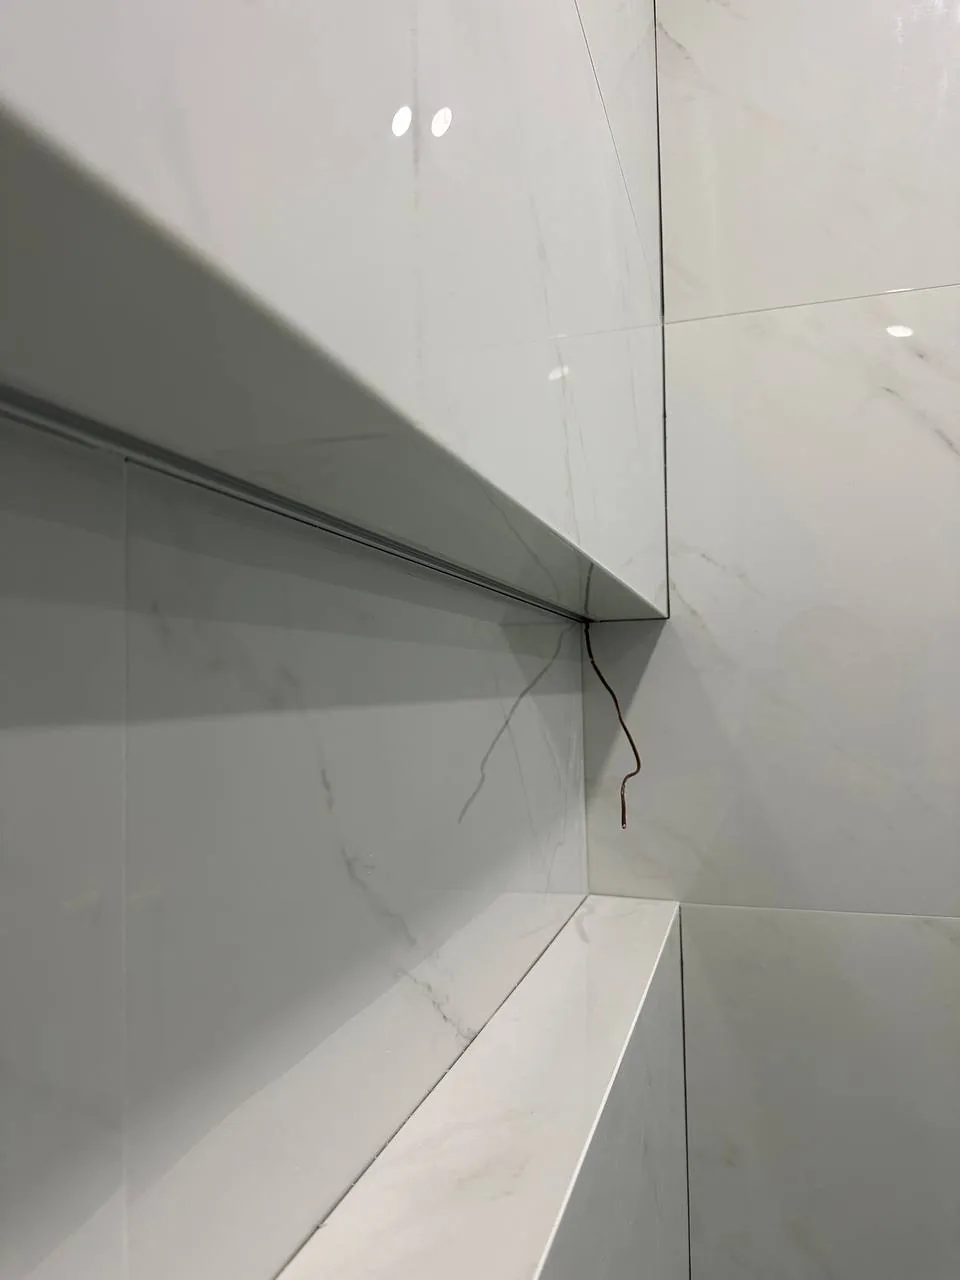
Detail
Slab turning a corner without a trim strip
The wall turns the corner in the same material it started in. This is slow work and it is the difference people feel without being able to name it.
-
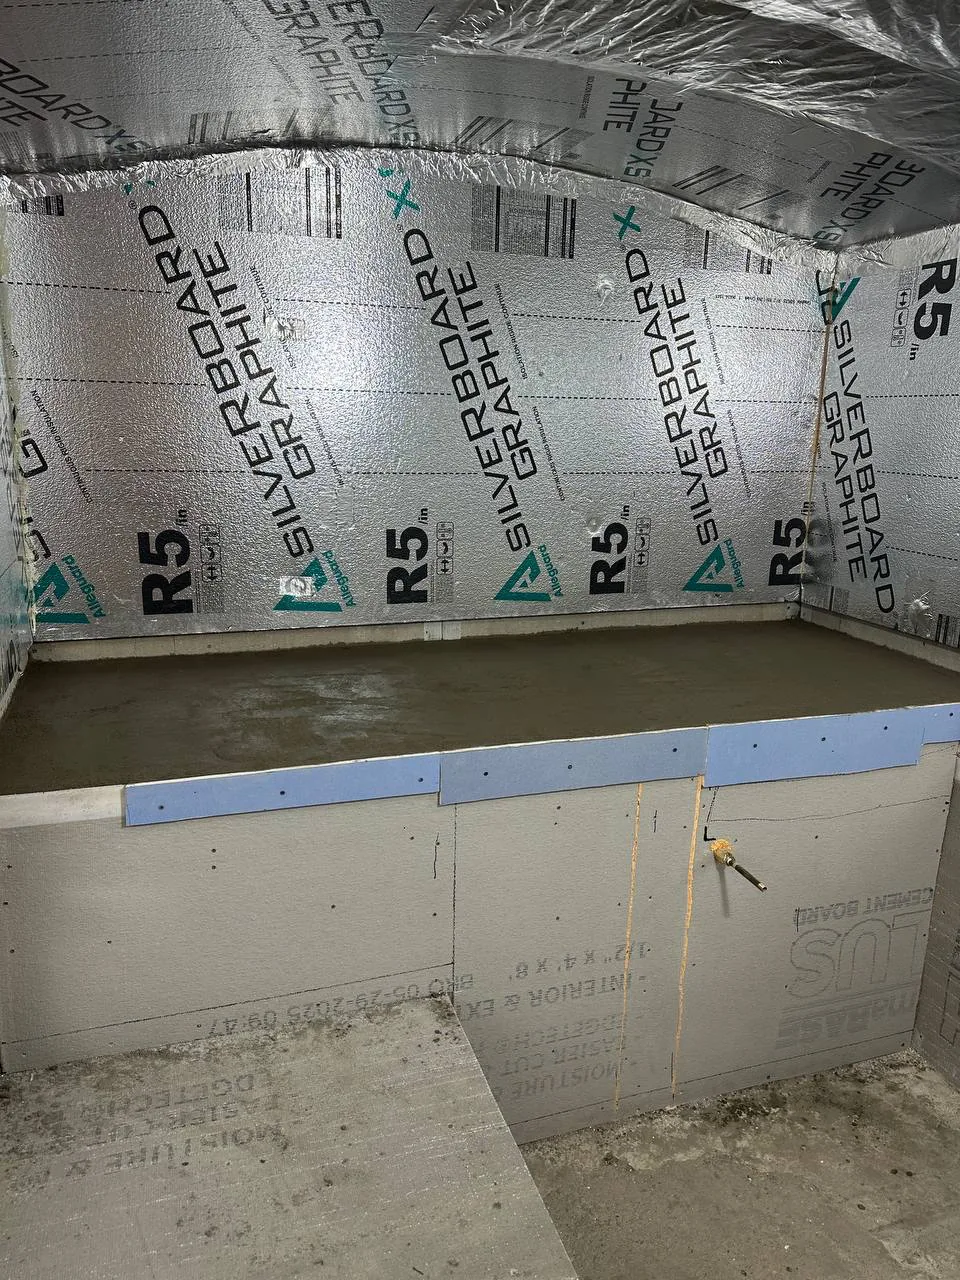
One basement wet room, start to finish Step 1 of 6
Heated floors
Insulation under the slab, before anything is poured
Heat put into a slab that sits straight on the ground goes into the ground. The insulation under it is the difference between a warm floor and a heating bill.
-
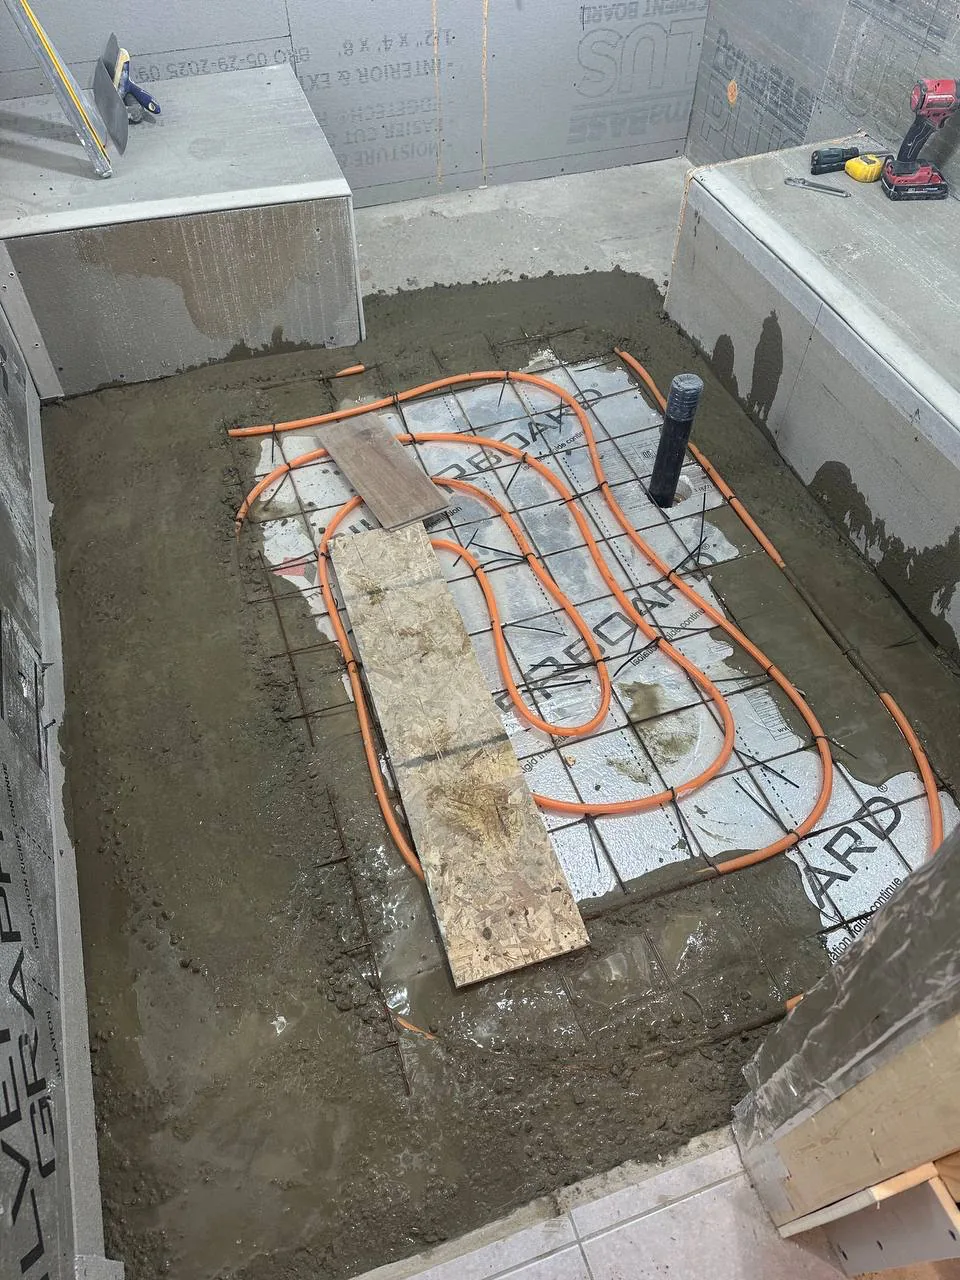
One basement wet room, start to finish Step 2 of 6
Heated floors
Water heating loops tied out before the pour
Loops tied to the mesh at an even spacing so they stay put under the concrete. Once the pour goes over this, nothing here can be adjusted for the life of the house.
-
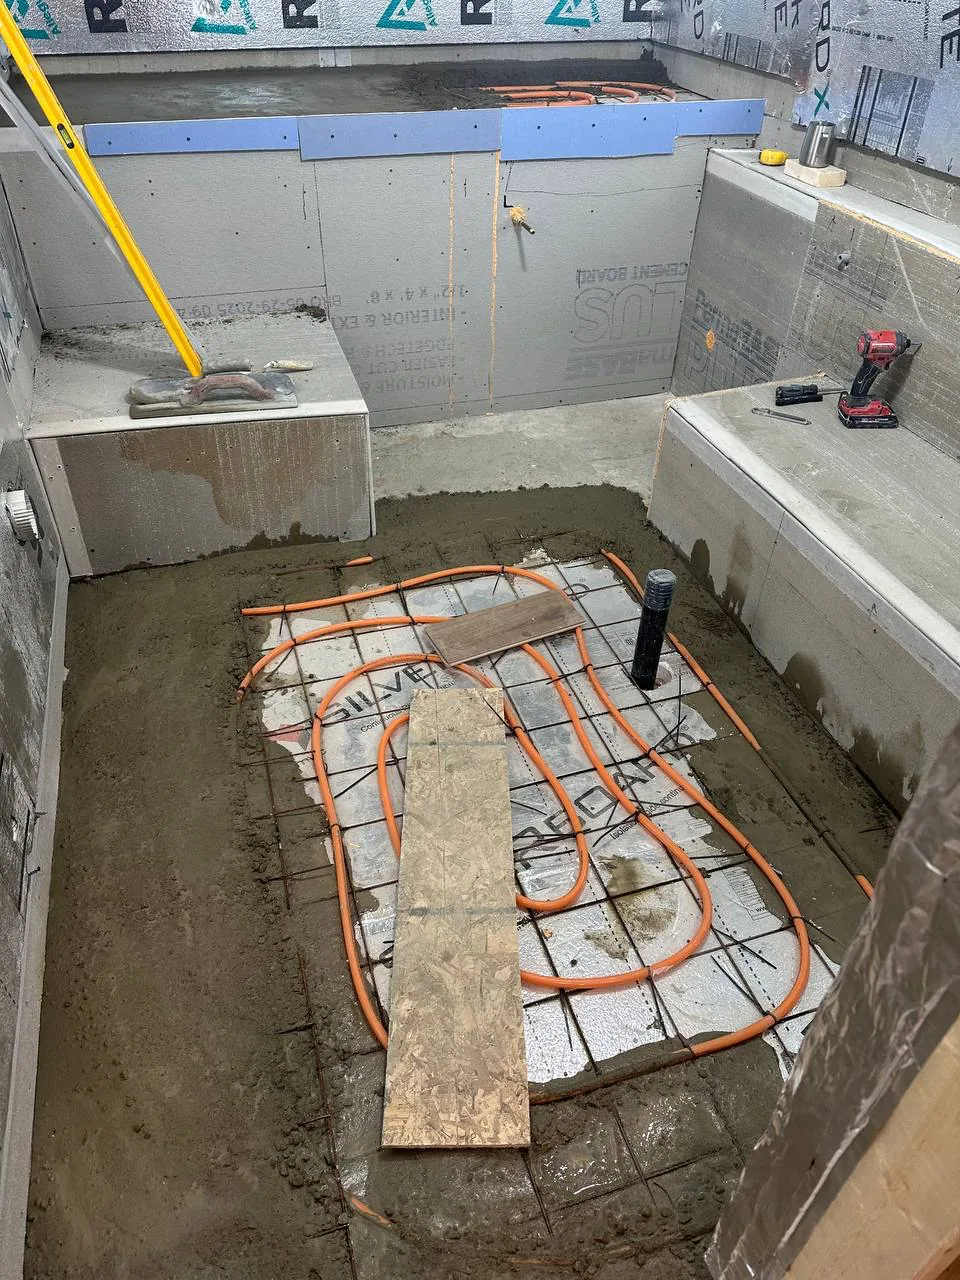
One basement wet room, start to finish Step 3 of 6
Heated floors
Benches formed, walls lined, ready for concrete
The benches are formed in concrete as part of the room, not stood on the finished floor afterwards. There is no joint at their base for water to sit in.
-
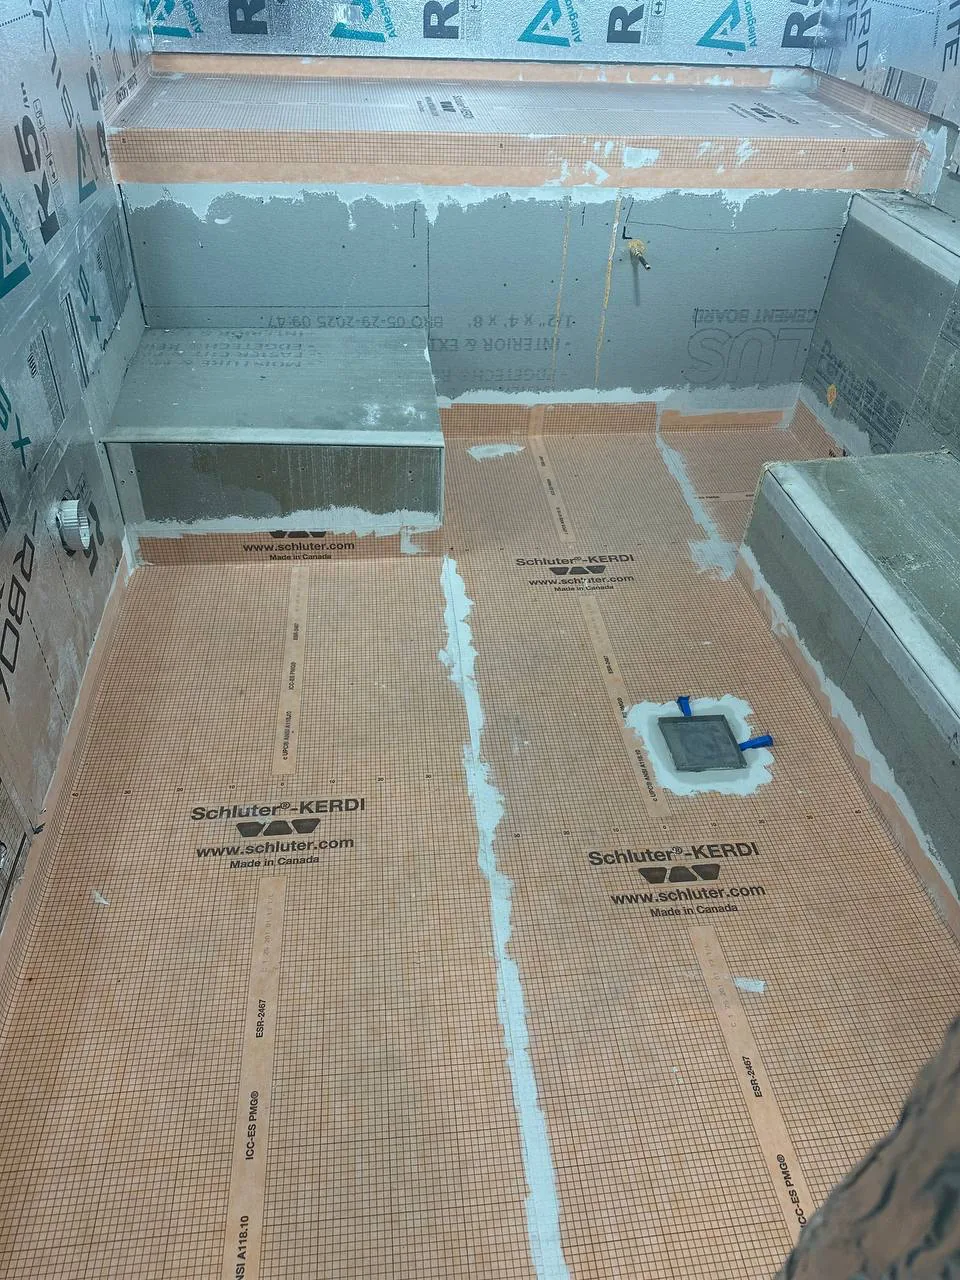
One basement wet room, start to finish Step 4 of 6
Wet room
The whole room brought under one membrane
Floor, benches and walls sealed as a single surface, with the drain taken in. In a room that will be full of steam, anything treated as a separate piece becomes the weak point.
-
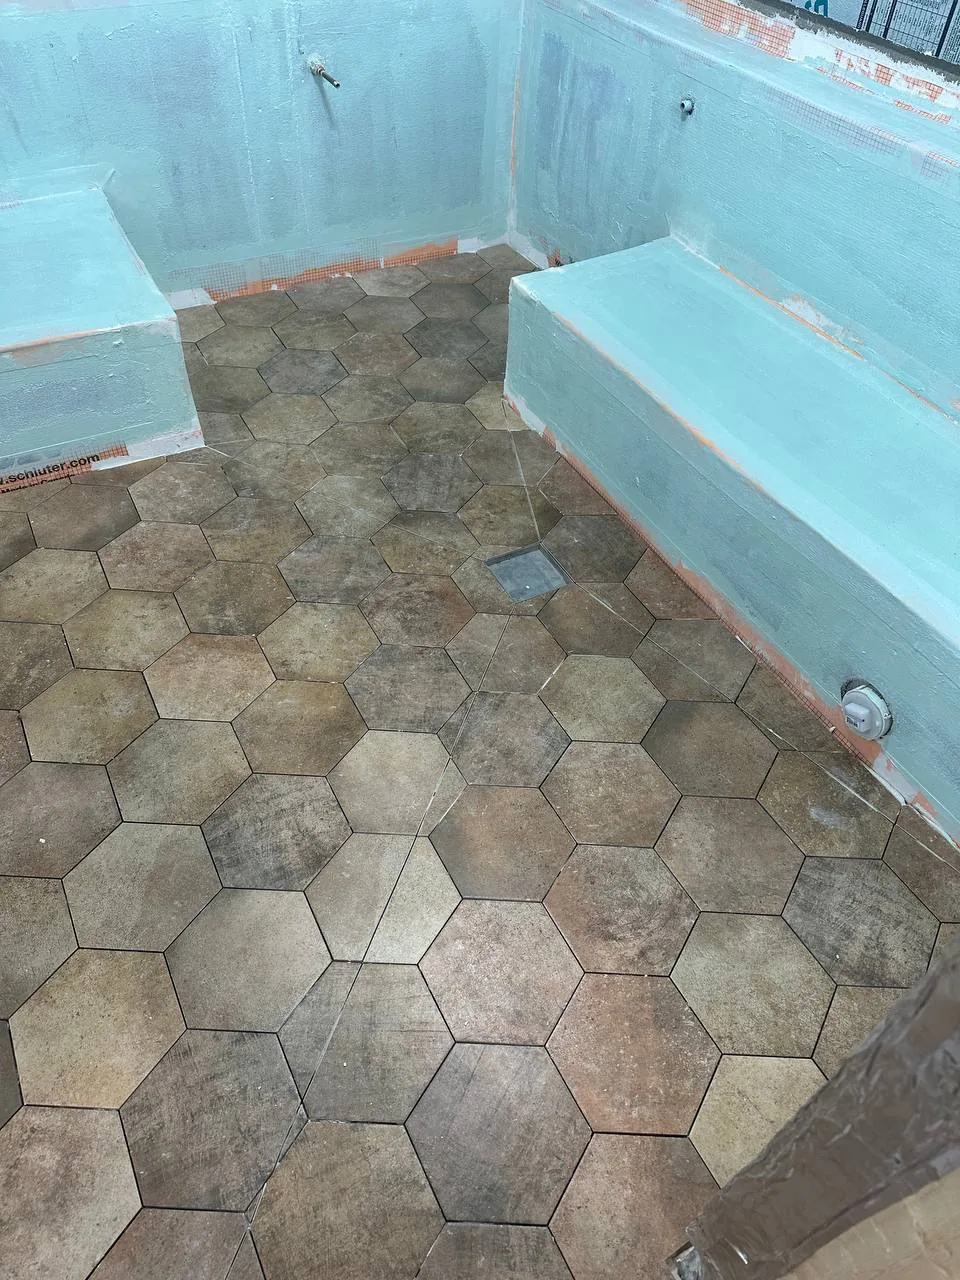
One basement wet room, start to finish Step 5 of 6
Waterproofing
A second, liquid coat over the joints
Blue over orange: a liquid membrane on top of the sheet, worked into every internal corner. Two systems doing the same job, which is what a steam room is worth.
-
One basement wet room, start to finish Step 6 of 6
Wet room
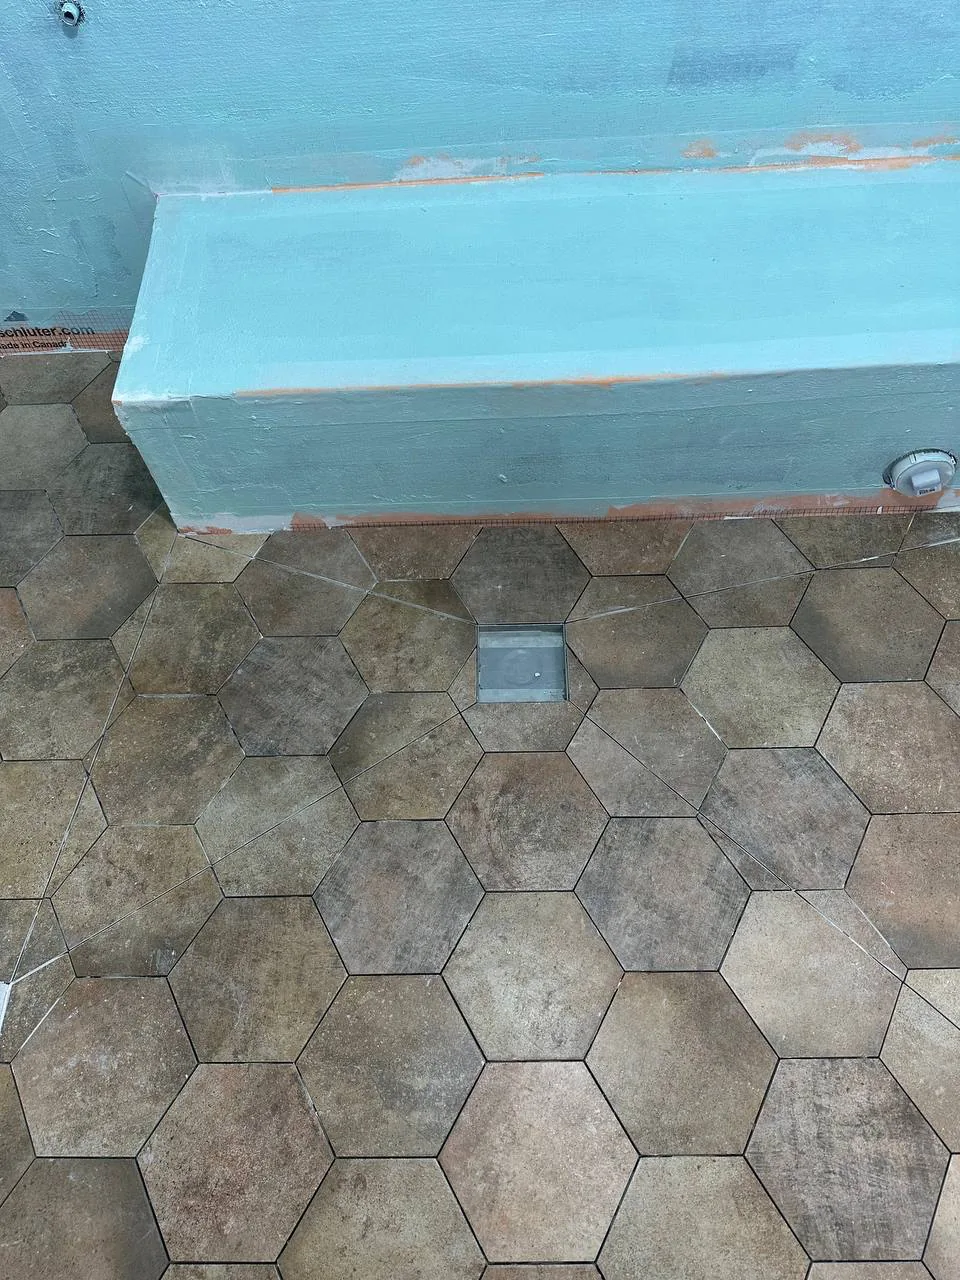
Hexagon tile taken over the floor and up the benches
Small format on a floor that has to fall towards a drain from several directions at once. Large tile physically cannot follow that shape; hexagon can, and every fall still has to be right.
-
Bathroom
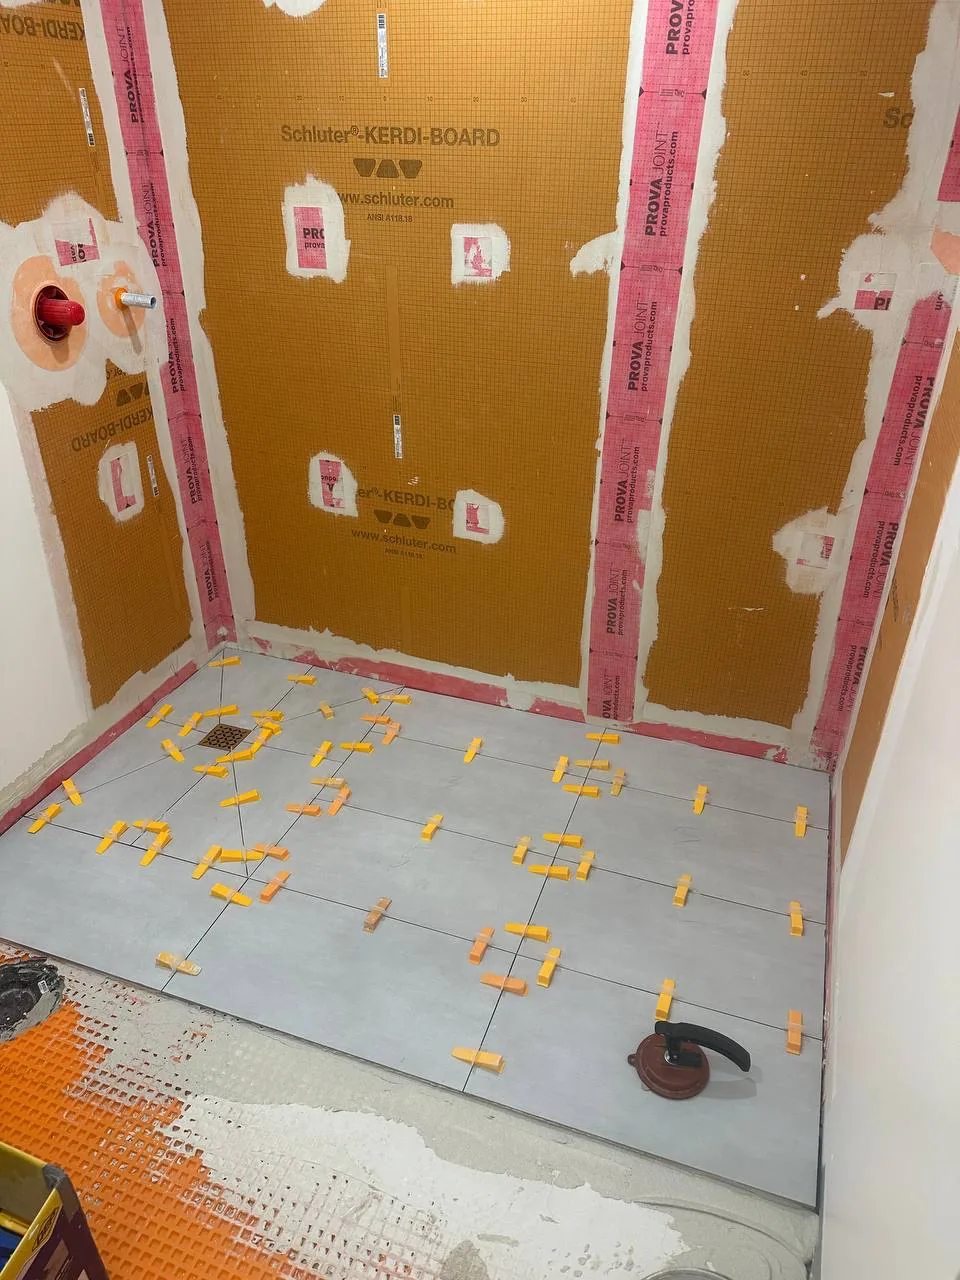
Waterproof board up, floor clipped out flat
Boards taped at every seam and every screw dabbed. The clips on the floor are on every joint, not every second one — that is the twenty minutes that decides whether light crossing the floor later finds lippage.
-
Waterproofing
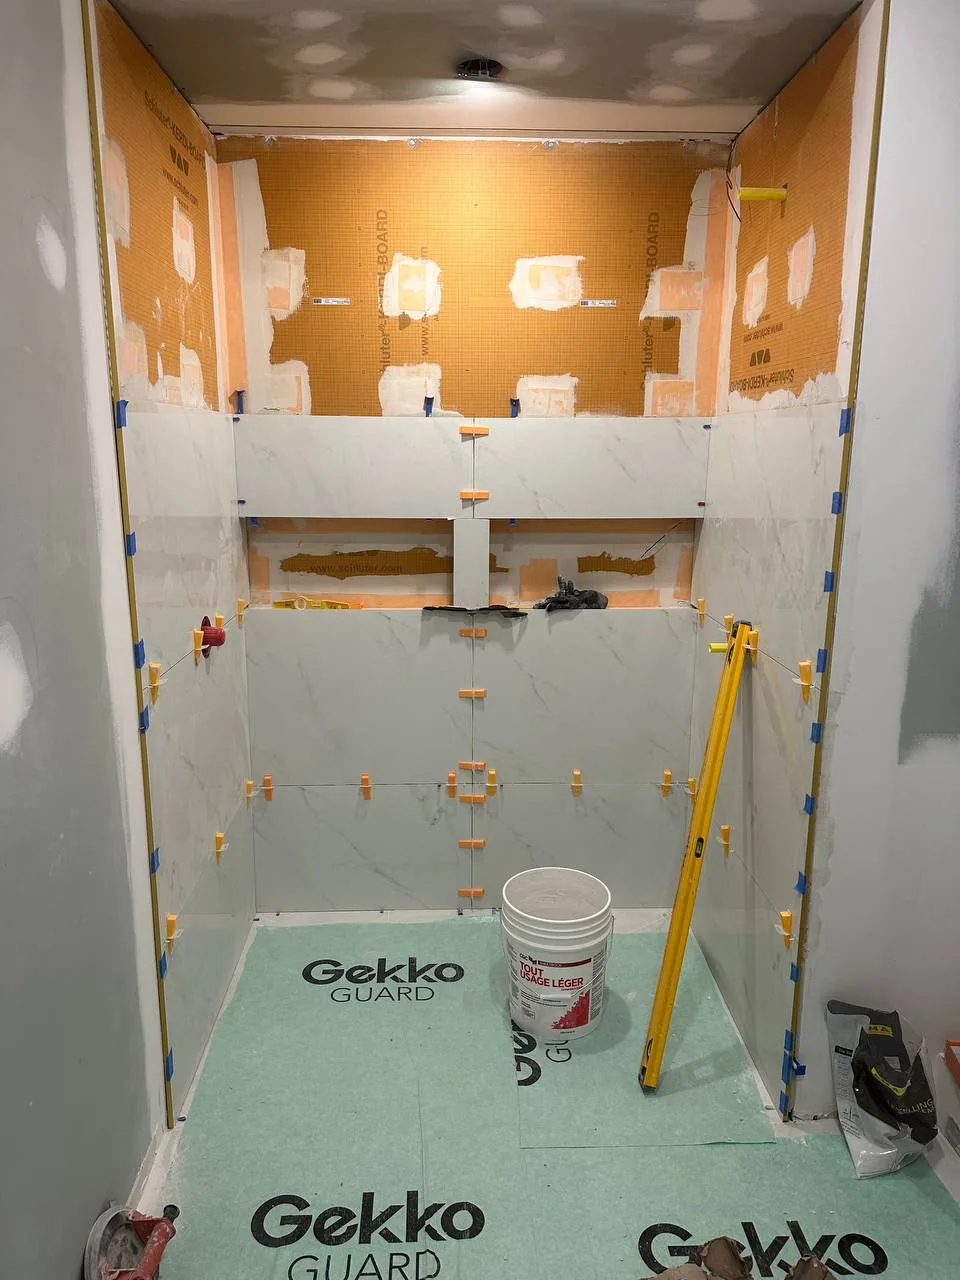
Niche and bench formed in waterproof board
The niche is built out of the waterproofing itself rather than cut into a finished wall. Nothing has to be patched afterwards, because nothing was opened up.
-
Shower
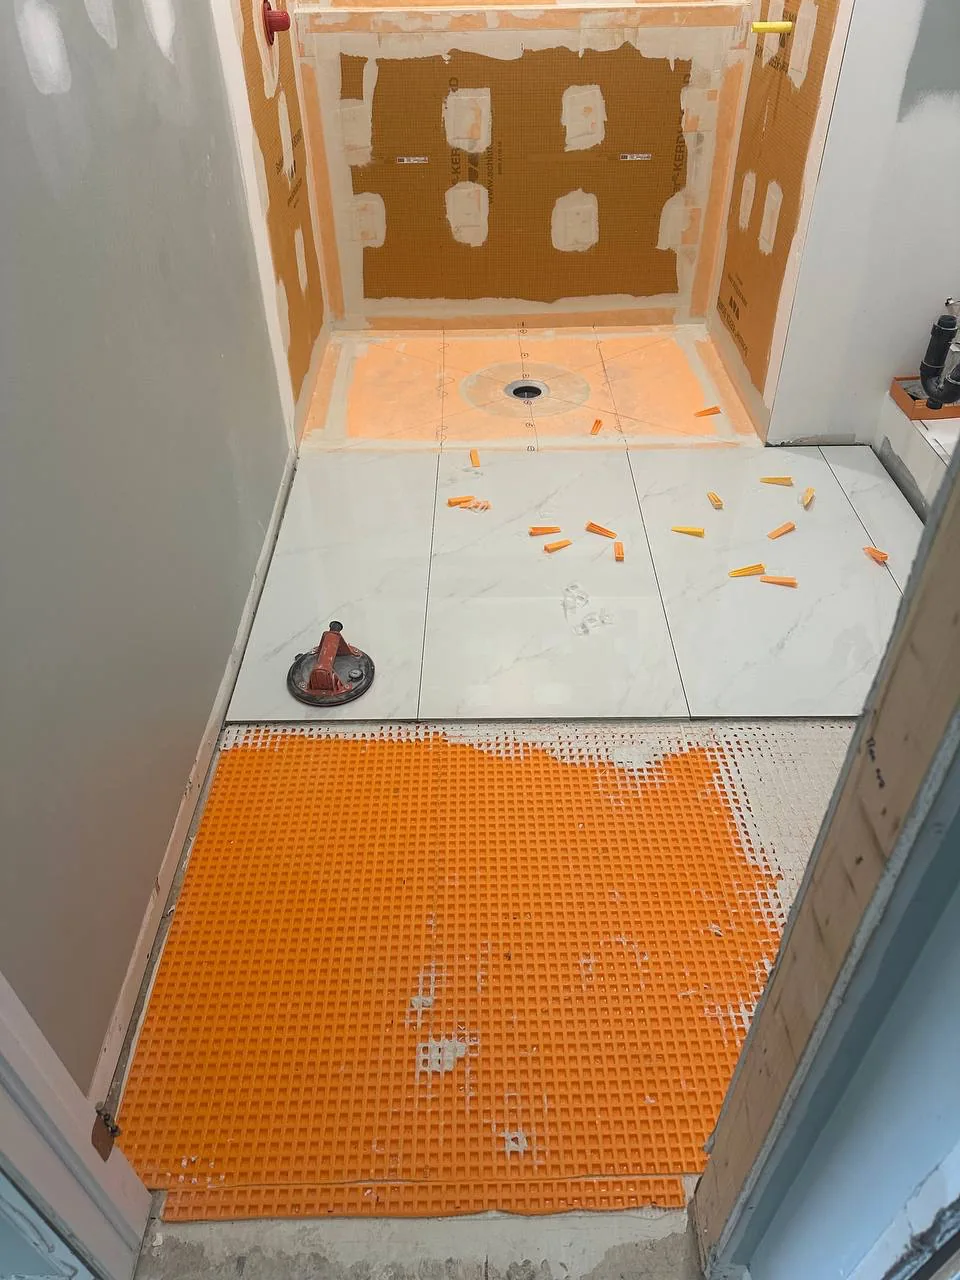
Curbless — the shower floor runs level with the room
No step to walk over, so all of the fall has to be built into a floor that still reads as flat. This is set out on the subfloor long before the tile arrives.
-
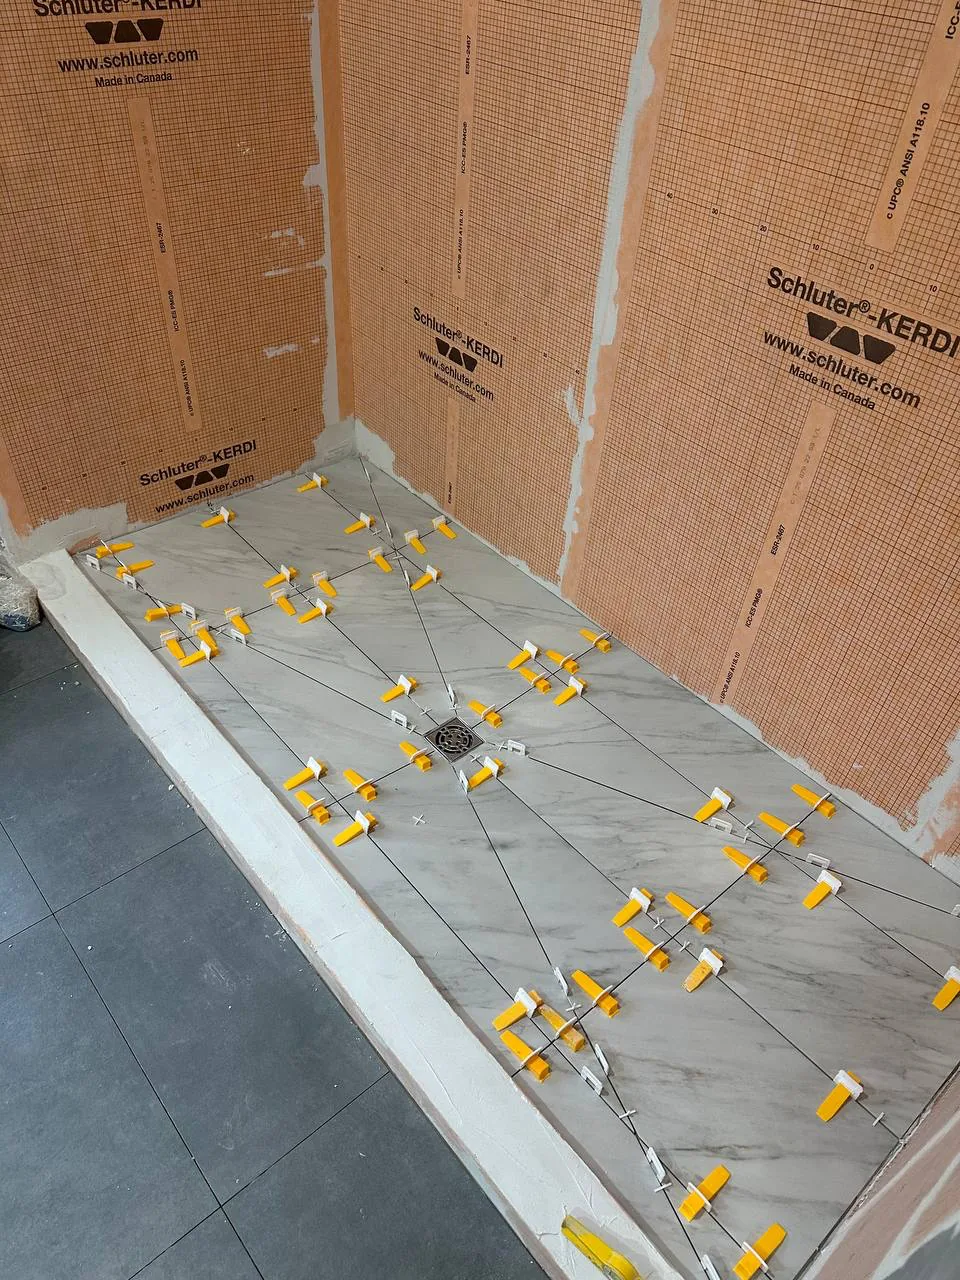
Shower
Linear drain, floor falling to it in one plane
A linear drain lets the whole floor tilt one way instead of into four triangles, which is the only way large tile works in a shower at all.
-
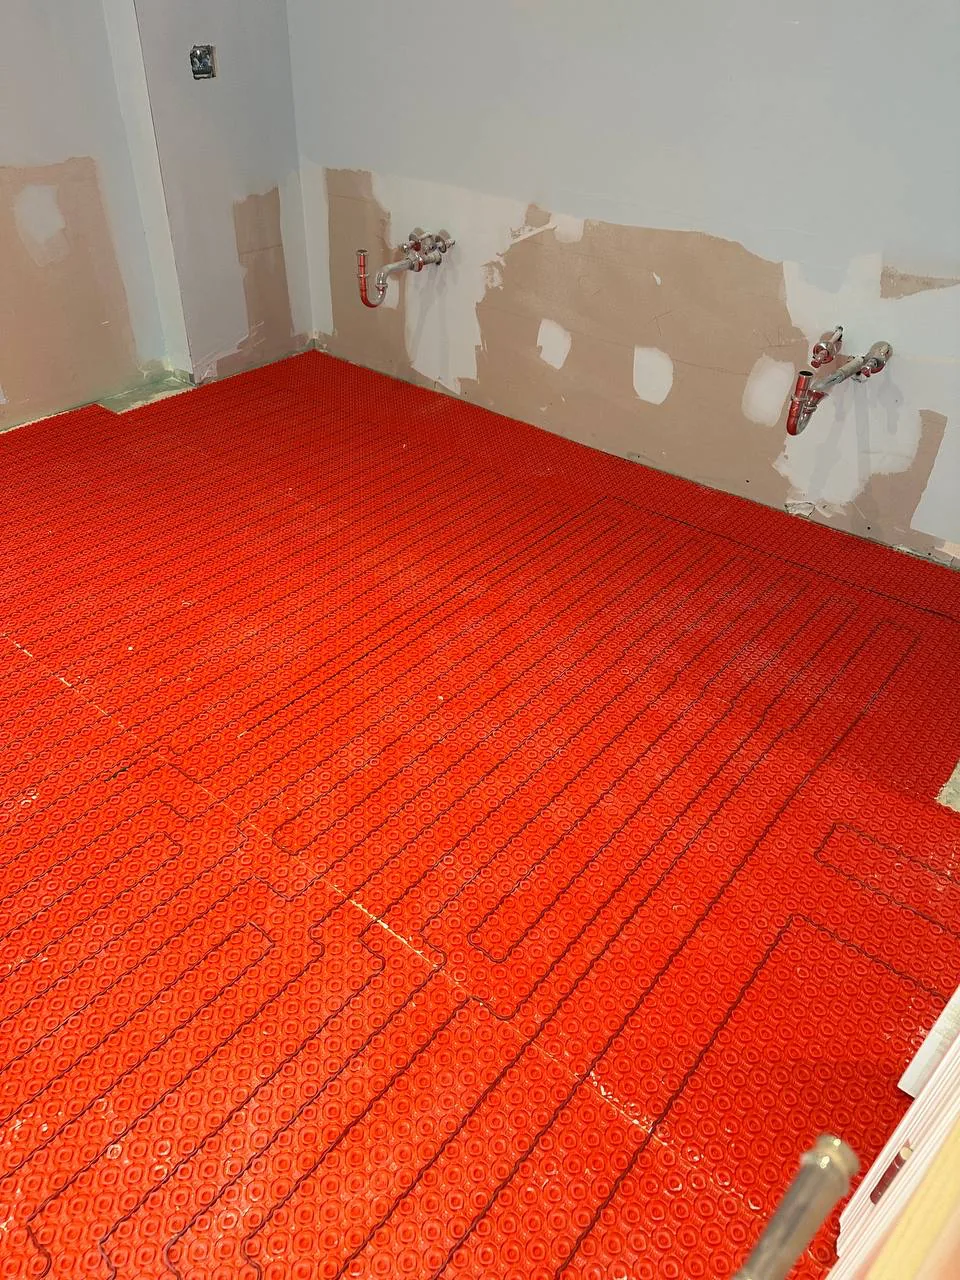
Heated floors
Heating cable run across the full floor
Even spacing across the whole floor, not just the walking lane. Cable crowded in one area and thin in another is what produces a floor with warm patches and cold ones.
-
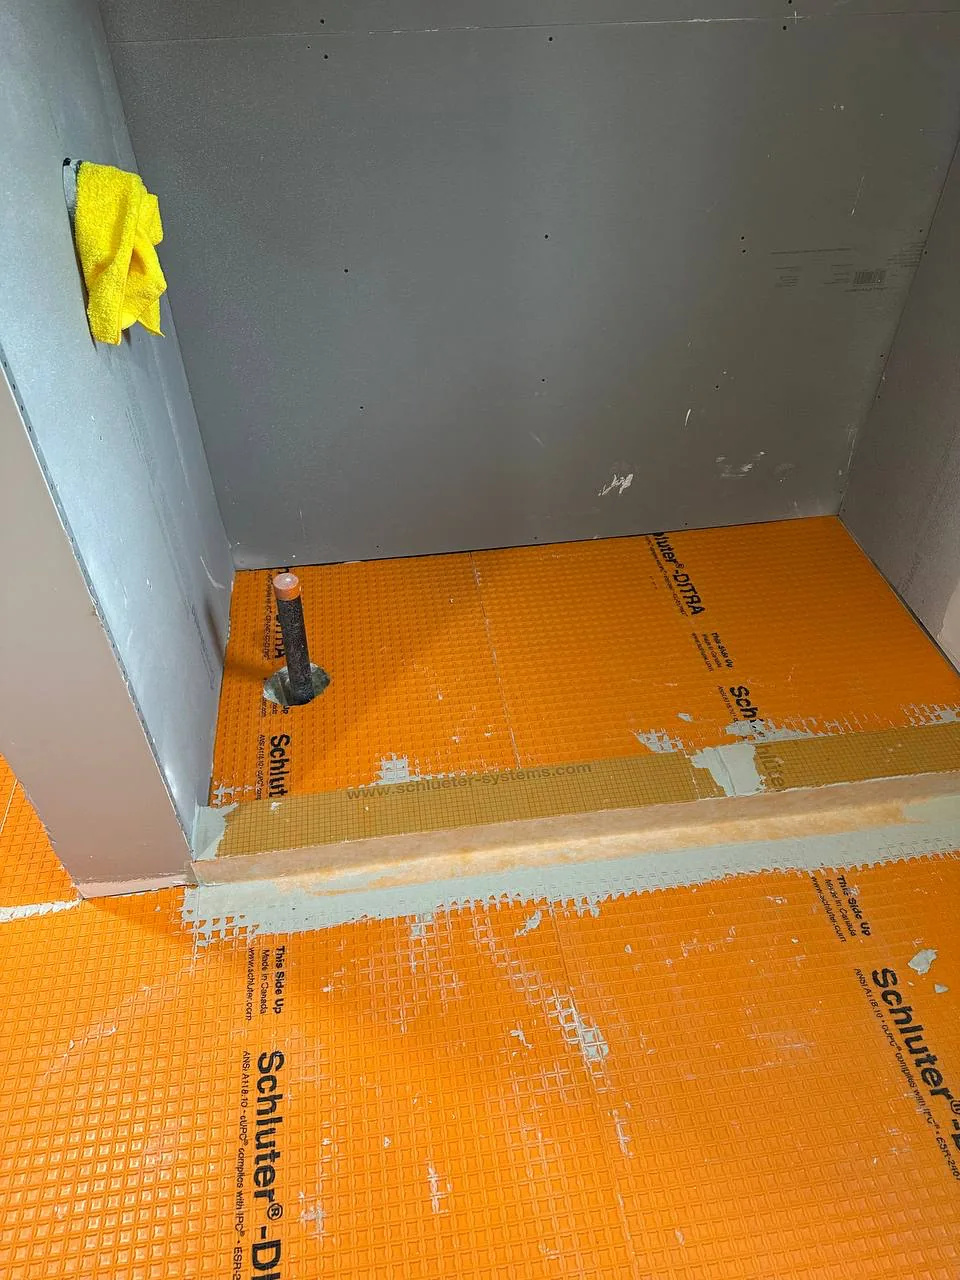
Heated floors
Heating membrane taken right to the walls
It runs under where the vanity and the toilet will stand, not just the open middle. Heat that stops short of the walls is felt as a cold ring around the edge of the room.
-
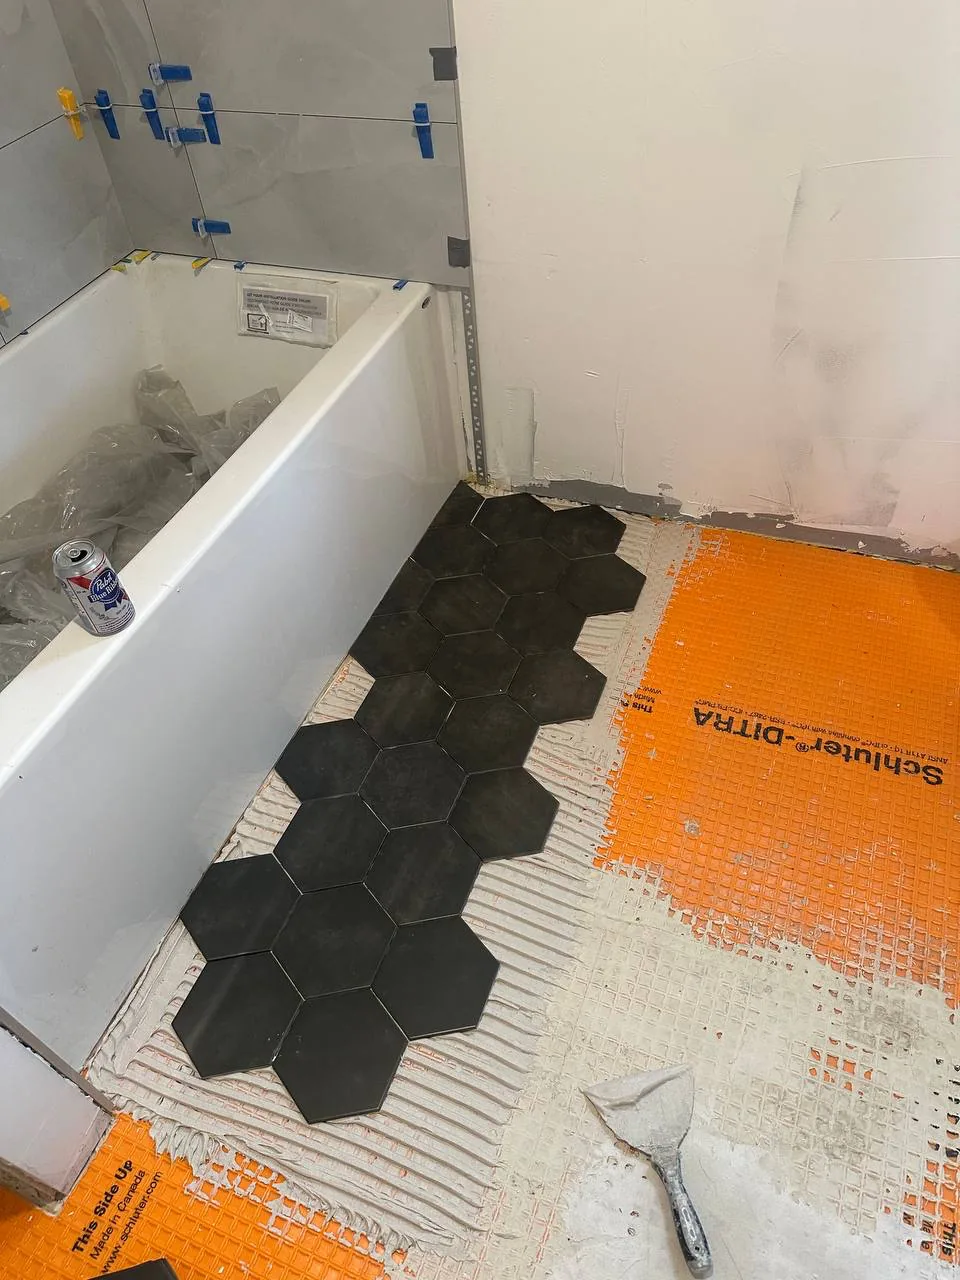
Bathroom
Hexagon going down over the membrane
Half the floor is tile and half is still membrane in this frame. That is the honest state of a bathroom mid-week, and the layout was set out from the bath so the cuts land where nobody looks.
-
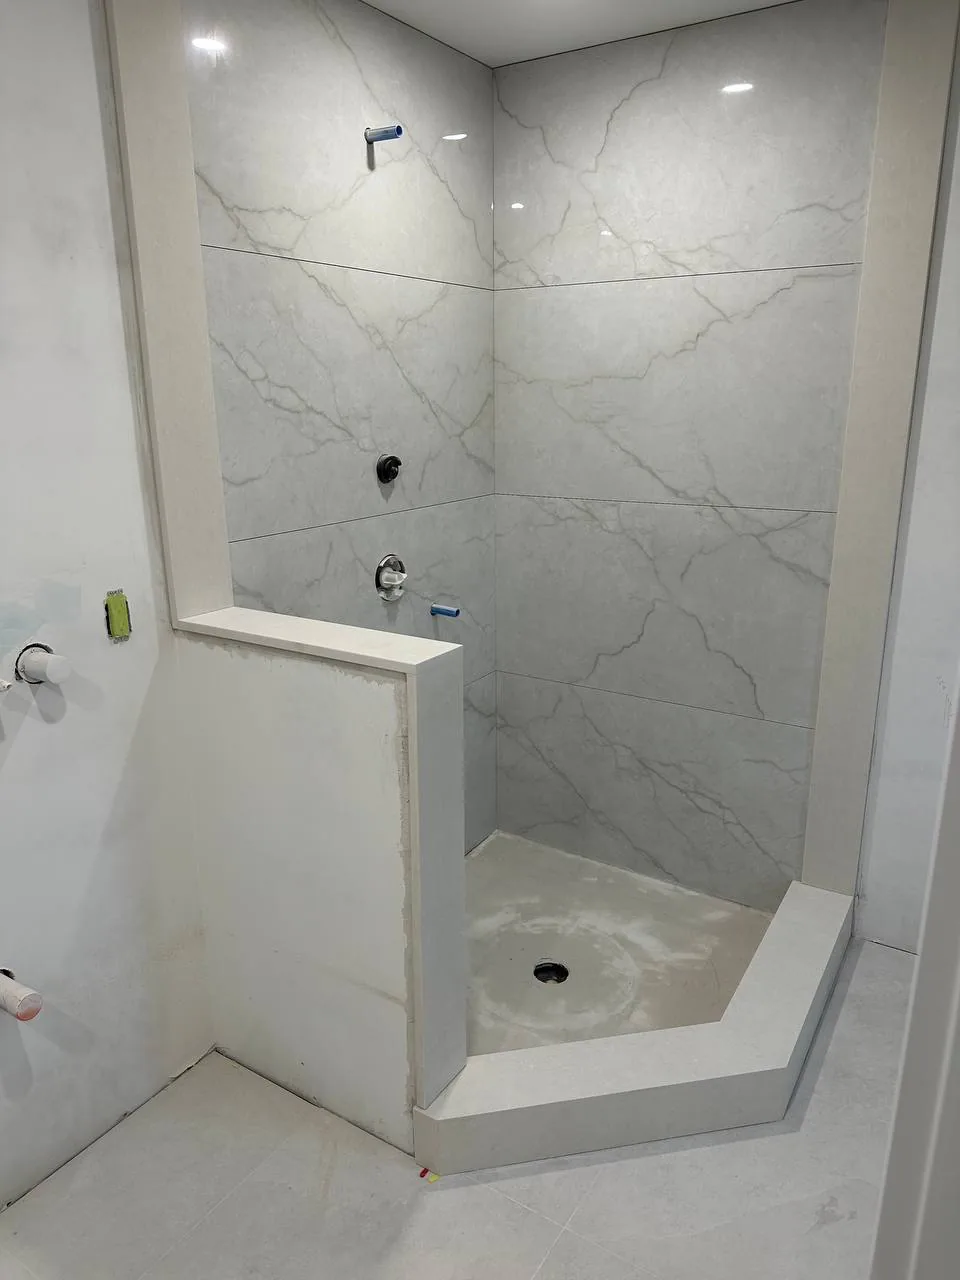
Large format
Walk-in shower, no step and no trim anywhere
Every corner in this room is a mitre. Look along the half wall: the material turns and keeps going, and there is no strip of anything covering the change of direction.
-
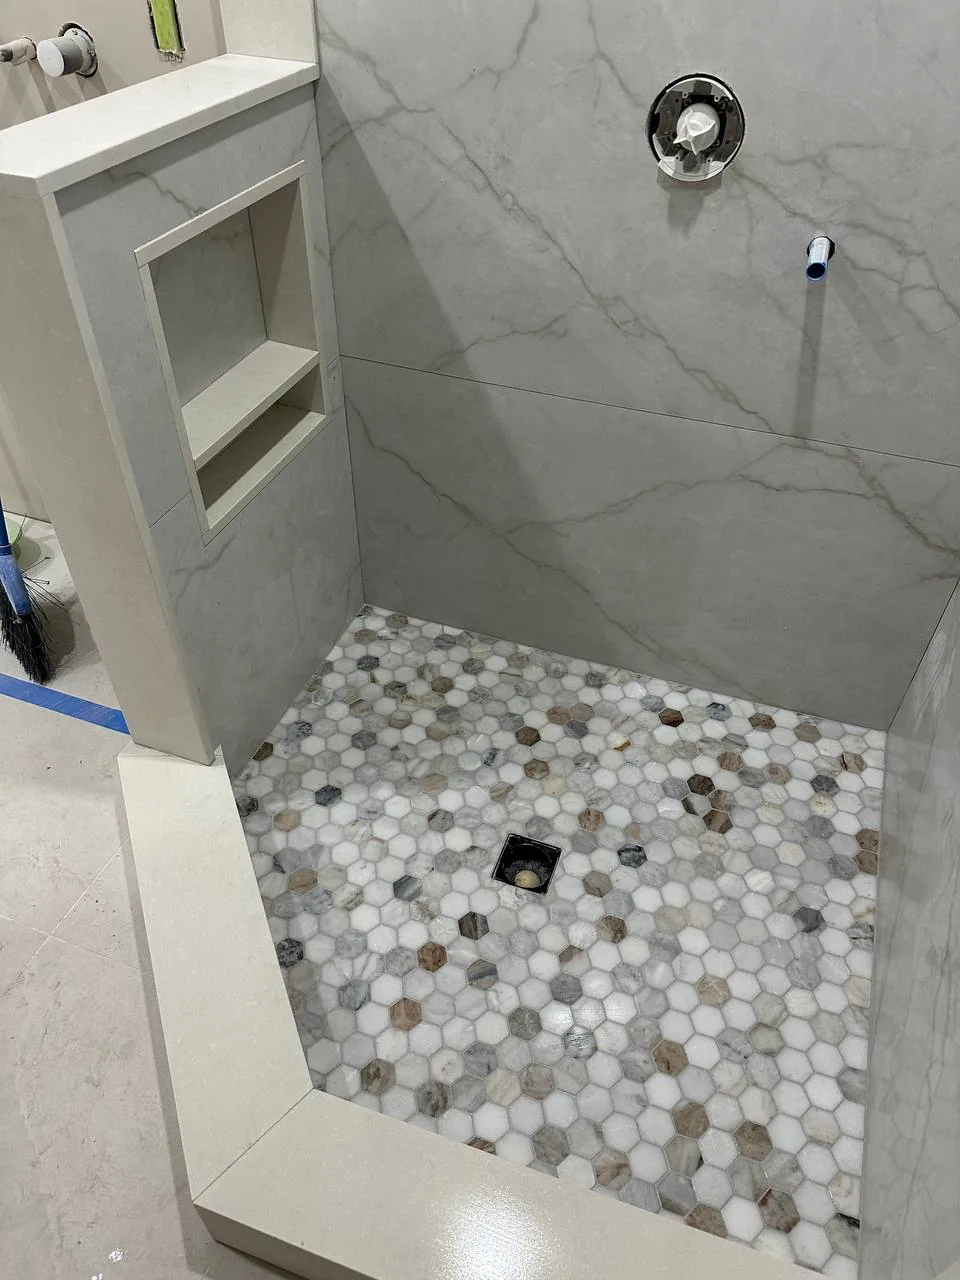
Bathroom
Pebble floor against slab walls
Round mosaic underfoot for grip, slab on the walls for the look. Two materials with completely different joint widths, meeting on a line that had to be planned before either was ordered.
-
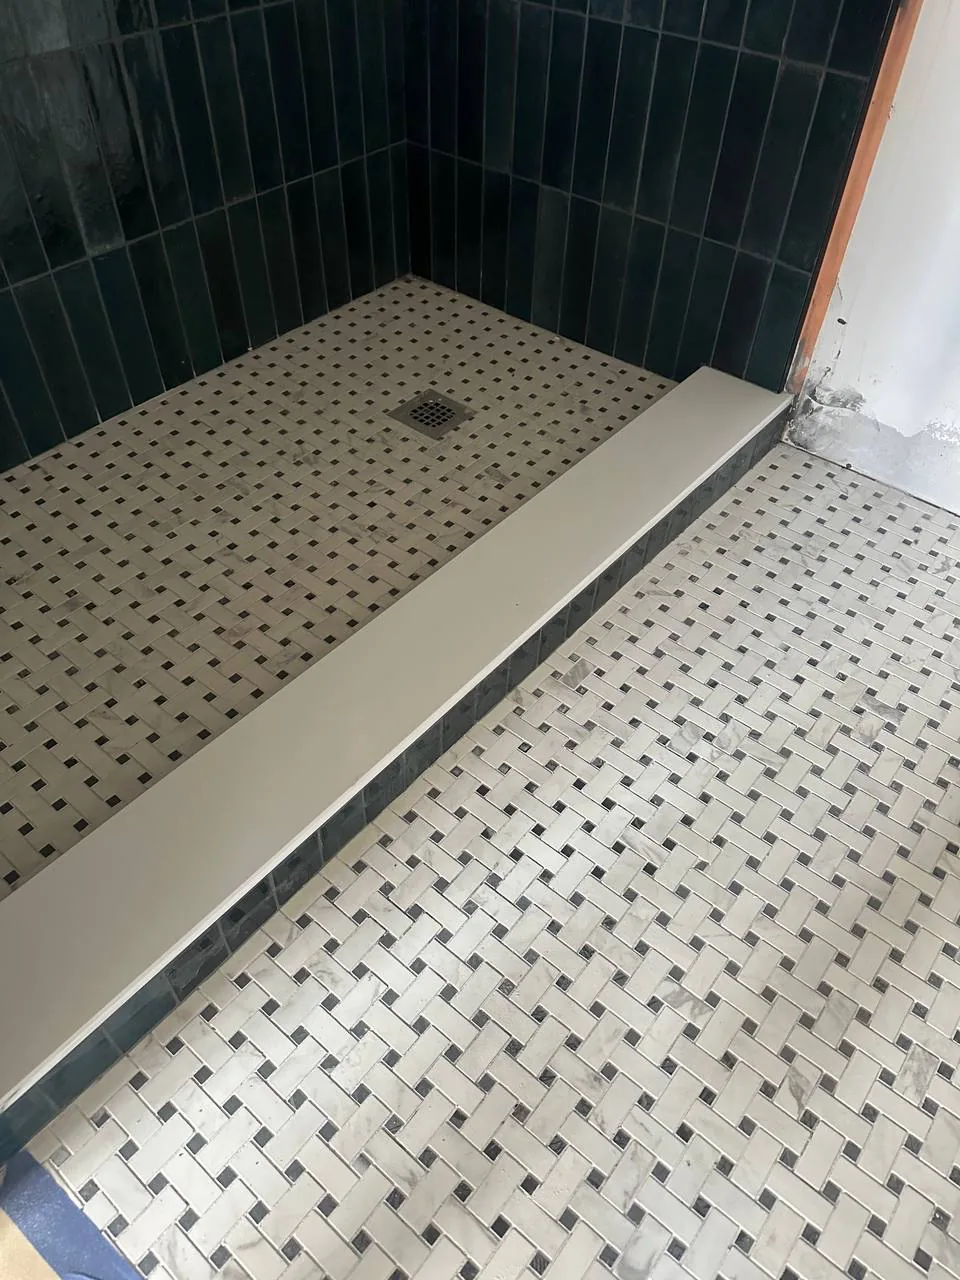
Bathroom
Basketweave floor, dark wall, one clean line between them
A patterned mosaic has to arrive at the wall without a half-motif. That is decided by where the first sheet is laid, and it cannot be fixed at the end of the run.
-
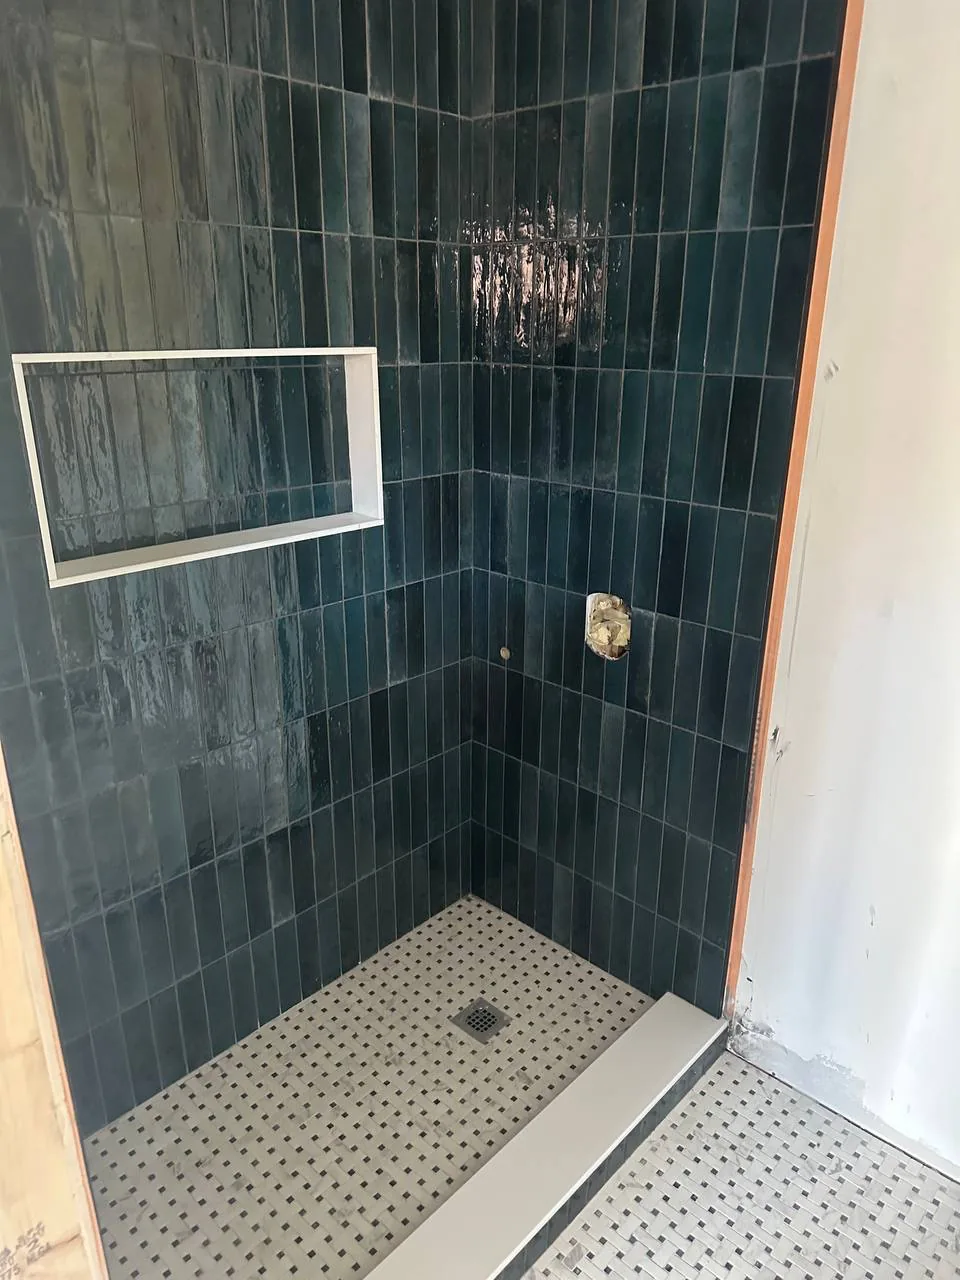
Bathroom
Handmade-look tile, stacked and kept plumb
Every piece of this tile is a slightly different size and none of the edges are straight. Stacking it vertically means the eye follows one continuous line up the wall, which leaves nowhere for the variation to hide.
-
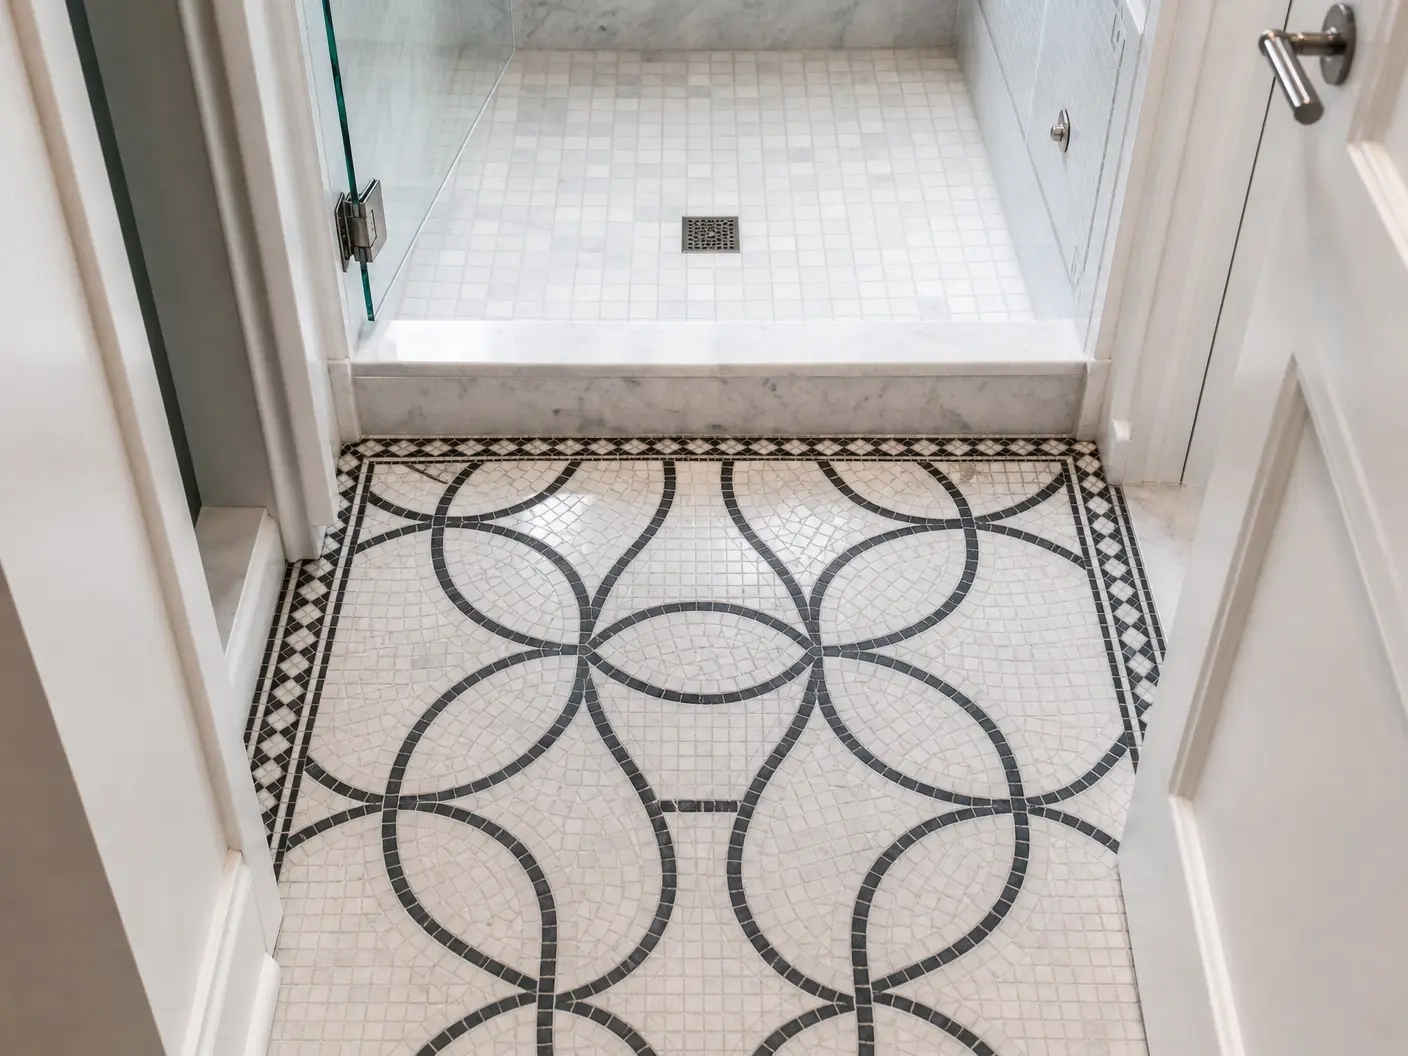
Bathroom
Custom mosaic floor, cut and set on site
An interlocking-circle pattern has no forgiving joint anywhere in it — every ring has to close on the next one. It was cut to fit this room, not bought as a ready-made sheet layout.
-
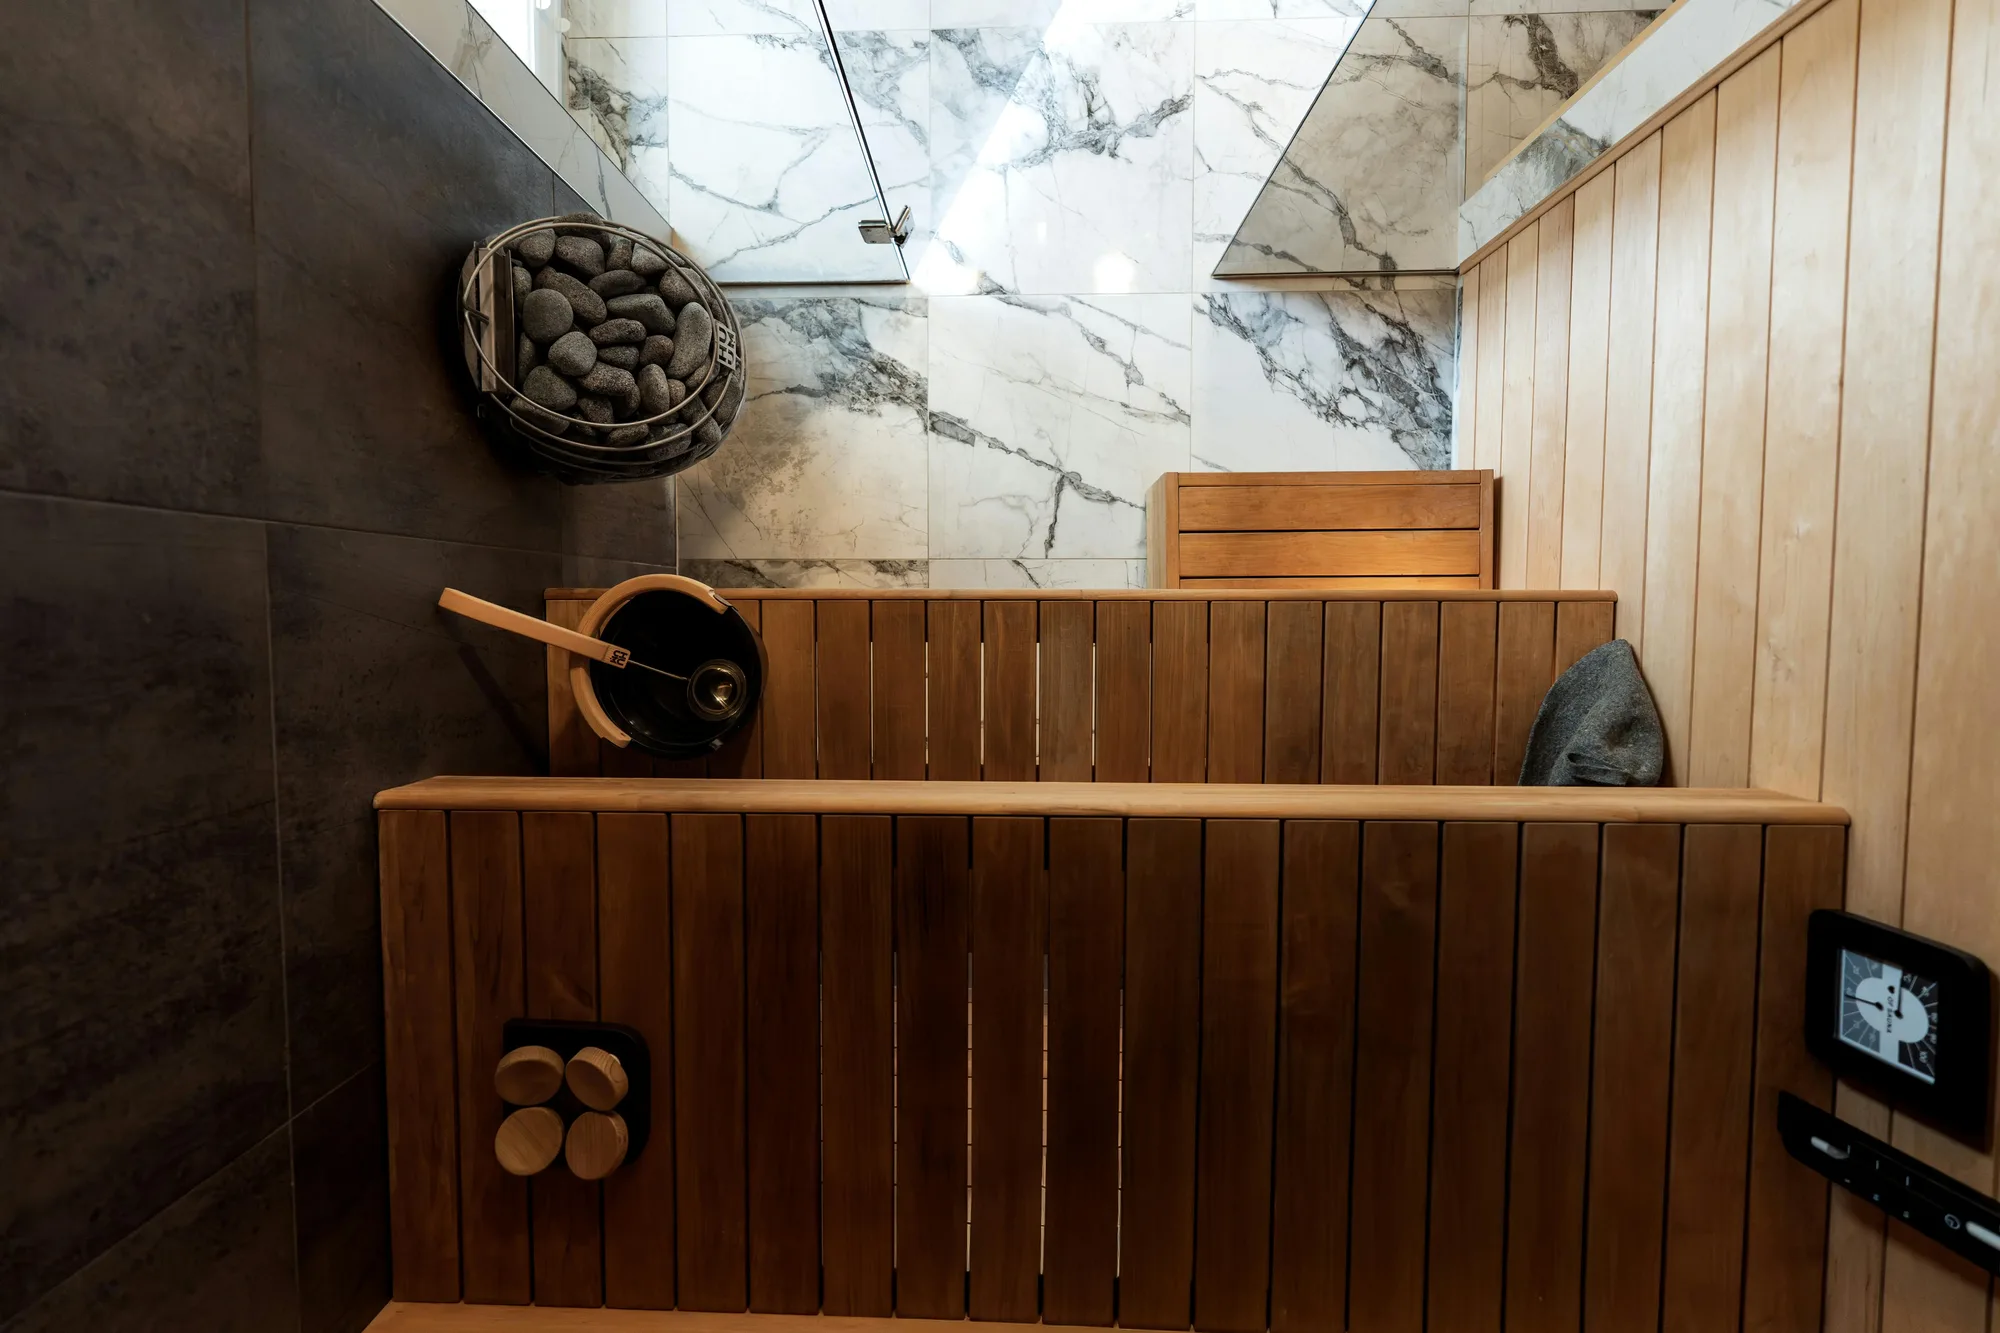
Wet room
Sauna — cedar, book-matched marble, large-format porcelain
Book-matched marble only reads as one slab if the veins meet across the joint. That is set out before the first sheet goes on the wall, not corrected afterwards.
-
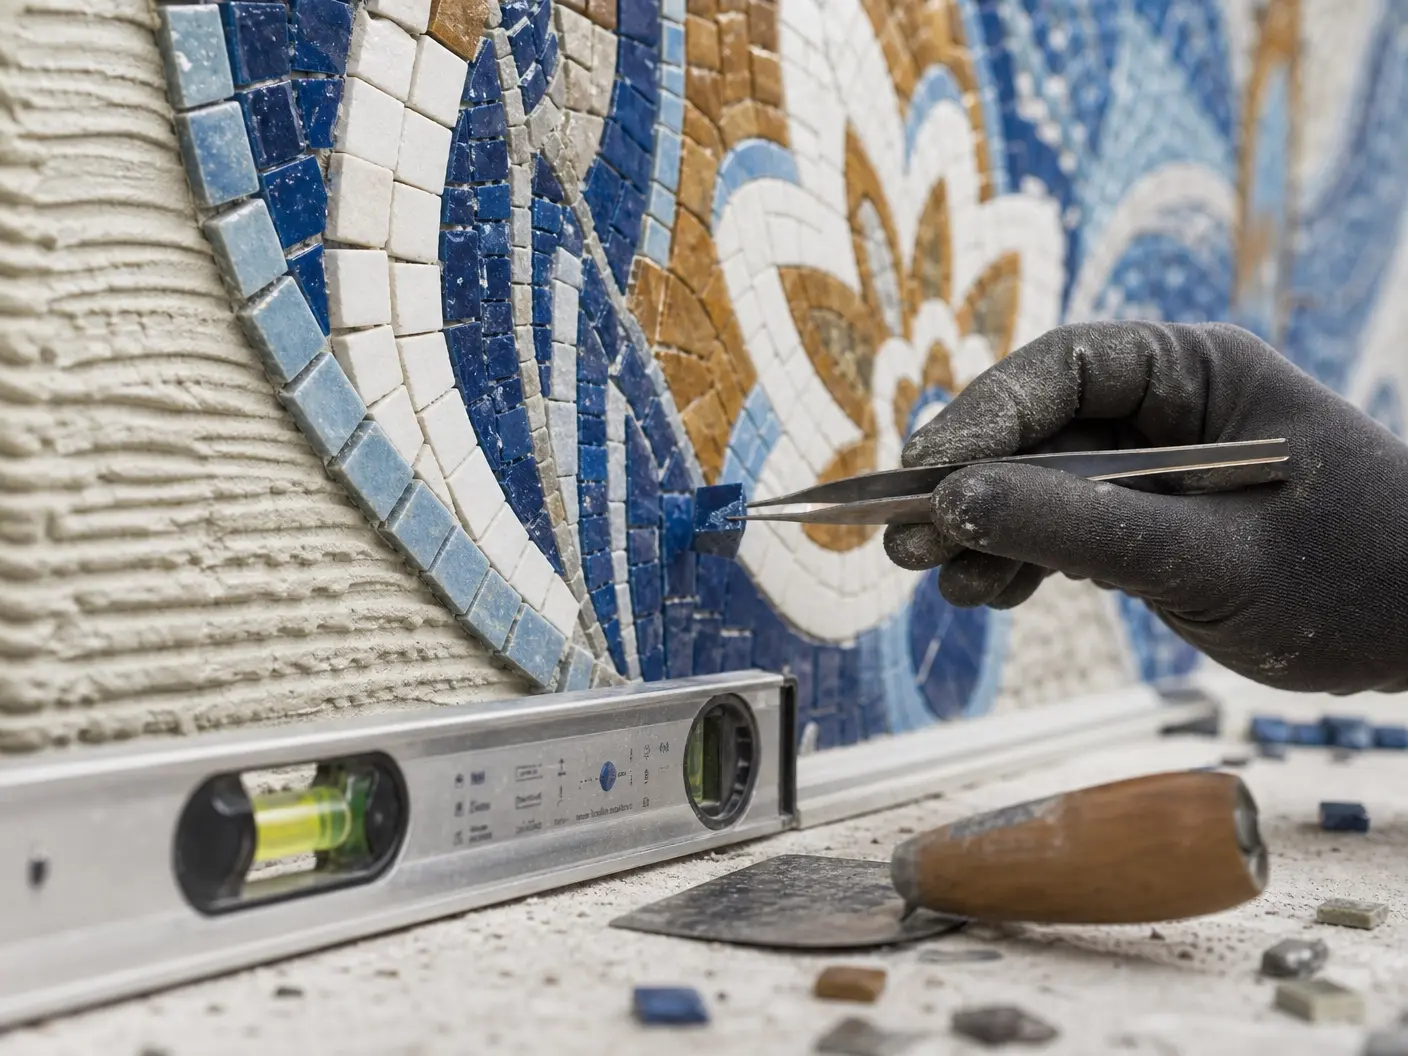
Detail
Mosaic set piece by piece, levelled as it goes
The level is in the frame for a reason: mosaic is where a floor goes out of plane fastest, because each piece is small enough to follow whatever is under it.
-
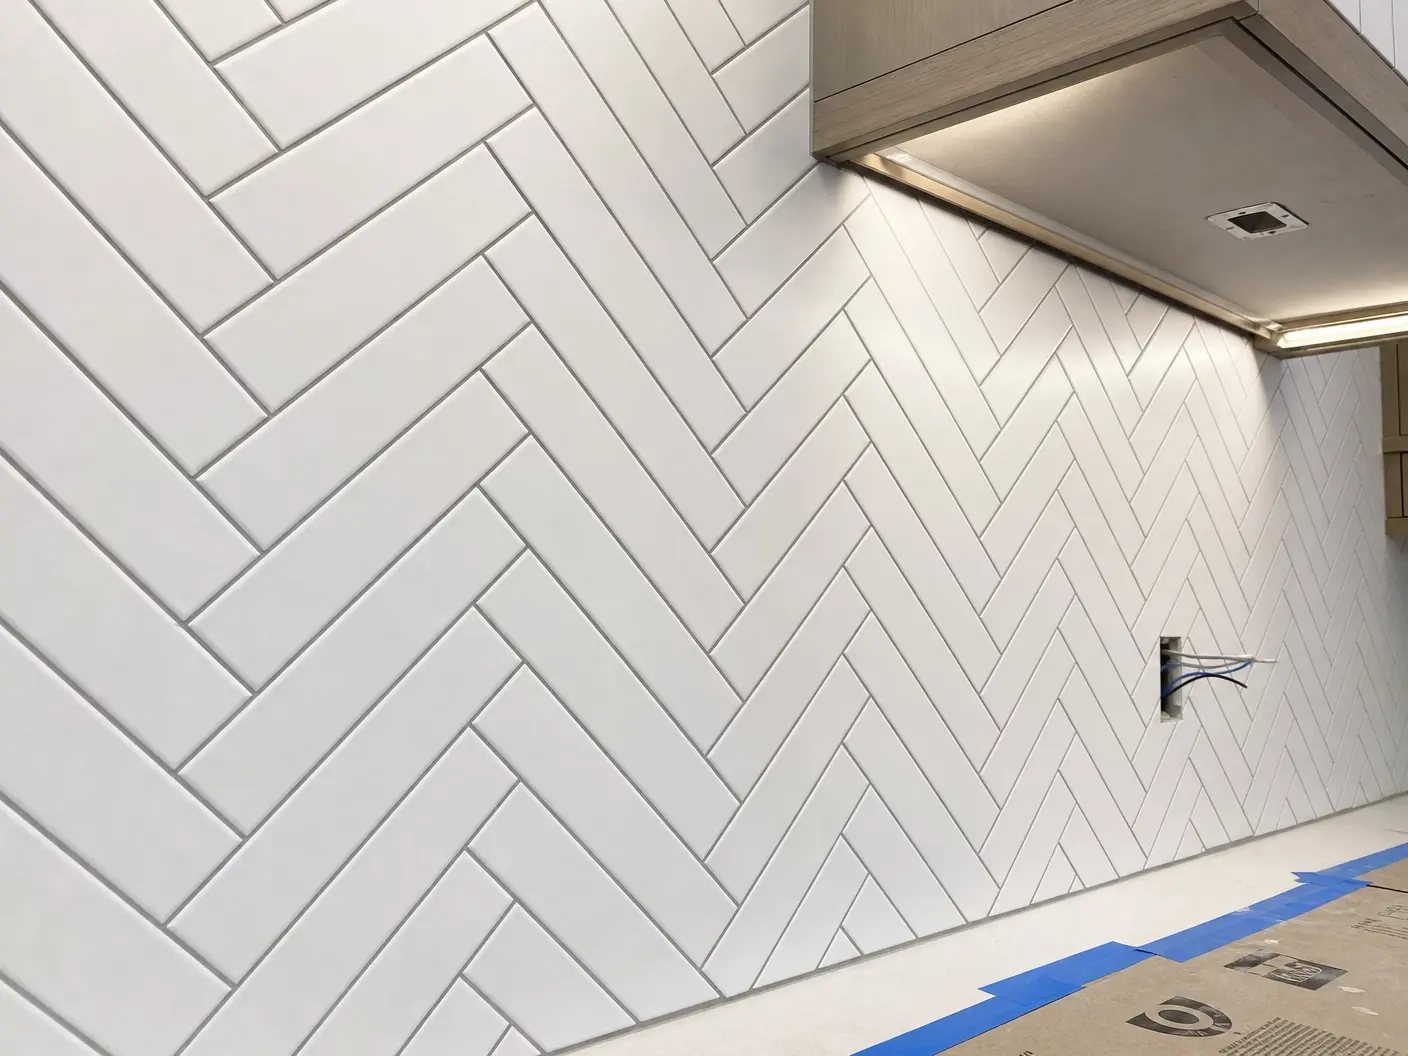
Kitchen
Herringbone backsplash, joints closed to the cabinet line
Herringbone doubles the number of cuts and every one of them is at eye level. The run finishes tight under the cabinets, with no filler strip of trim to hide the gap.
-
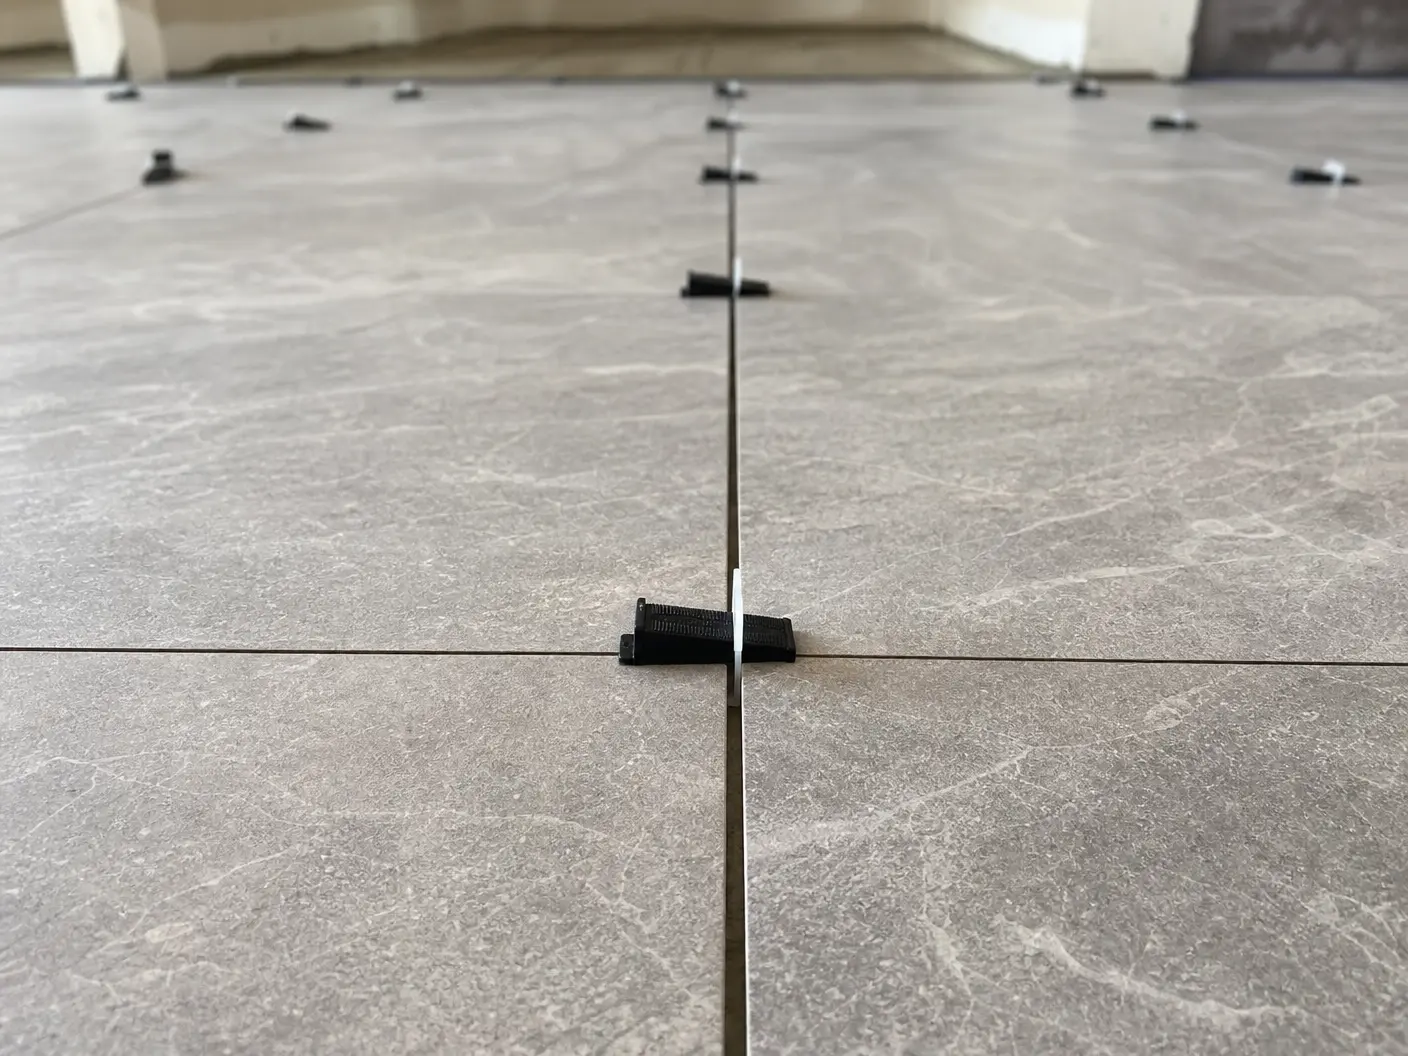
Large format
Levelling clips on every joint
Clips on every joint, not every second one. This is the twenty minutes that decides whether light crossing the floor later finds lippage or does not.
-
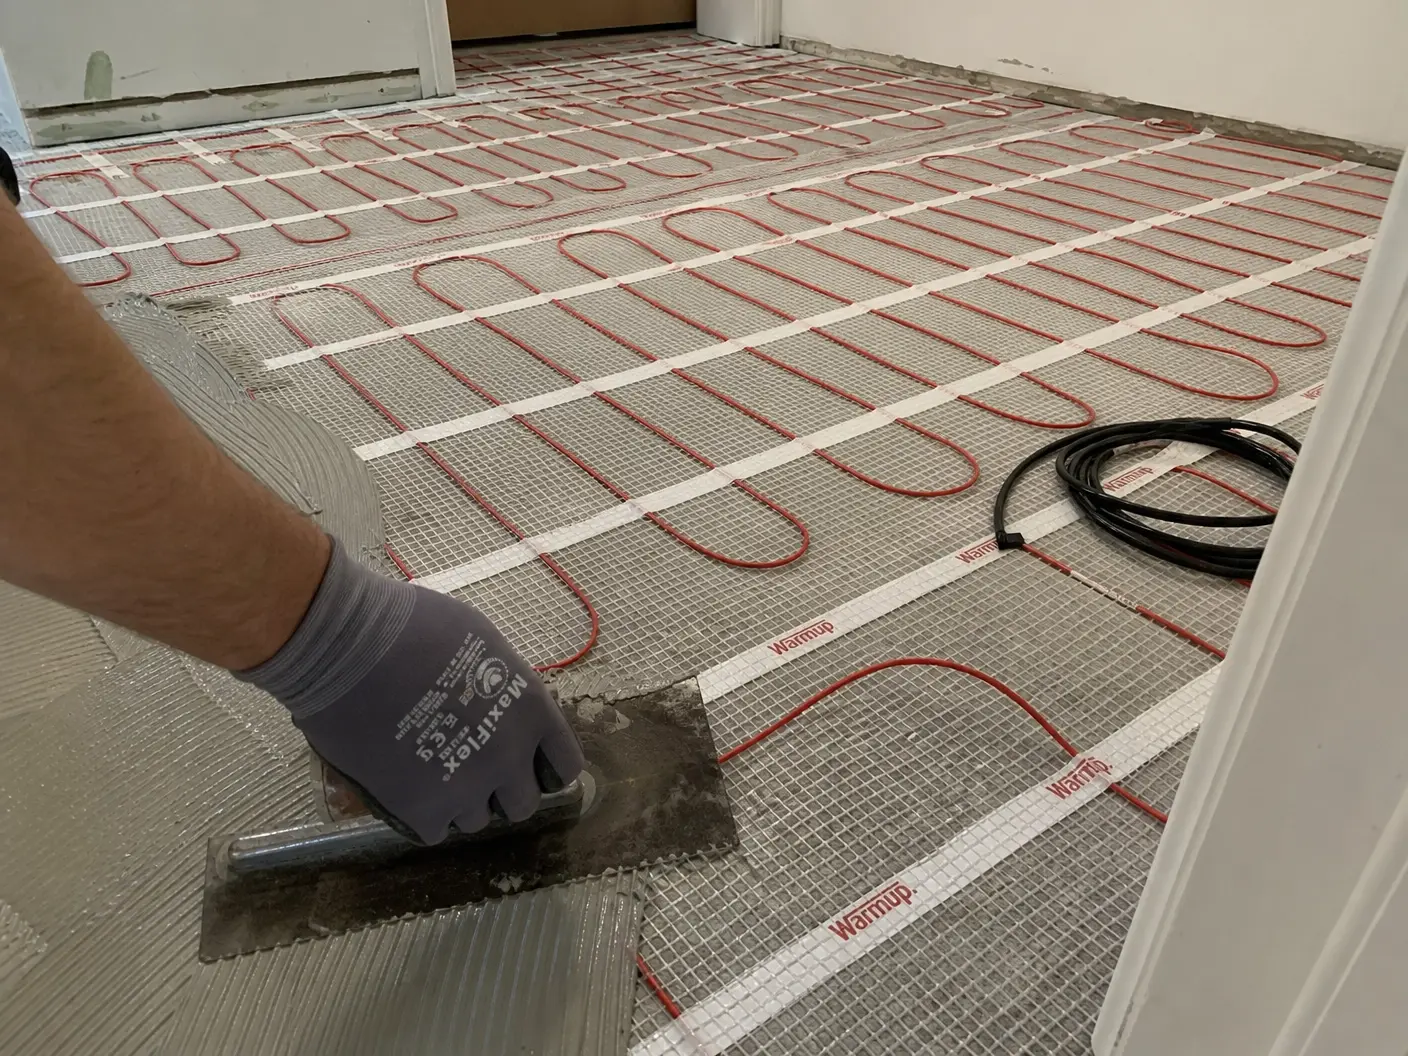
Heated floors
Mat system rolled out over the prepared subfloor
The subfloor is already clean, flat and prepared before the mat is unrolled. A mat laid over debris telegraphs every lump of it through the tile.
Why there are no client names here.
No addresses, no surnames, no “Modern Master Ensuite, 2024”. People let a tradesman into their house on the understanding that it does not end up on a website, and the ones who agree to be named are asked first.
The same rule decides which photographs appear at all: these are from his own jobs. No stock, no supplier catalogue, nothing borrowed — which is also why some pages on this site carry no photograph at all instead of a borrowed one.
Get a quote
Six short questions. A written price the same day.
No site visit to get a number, and no sales call afterwards. If the budget is not right, you will know from the reply instead of from an afternoon off work.
Rather just talk? (437) 875-1982 · English, русский, українська
- Liability insurance in place. Certificate on request.
- Written warranty on the workmanship, on request.